ralf | June 24, 2013 | community, Maps of the Month, user maps
Again, we’ve got a ton of great new user maps to present. The month goes by so quickly and still they continue to pile up. Let’s see what we’ve got…
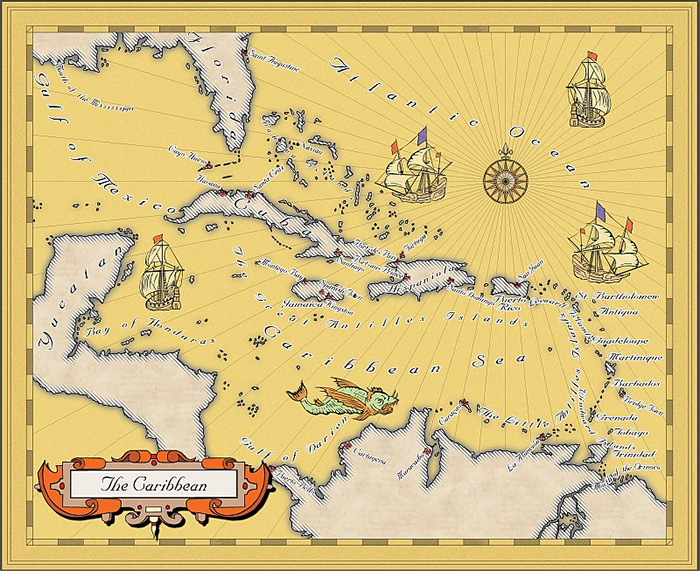
First there is the BlindMapMaker with this gorgeous rendition of the Caribbean Sea in the Mercator Historical style. Way to start this round-up!
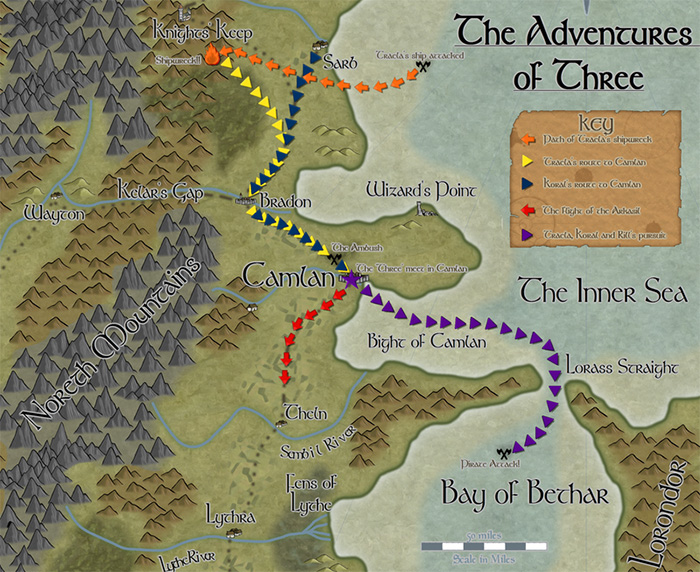
TolrendorDM used the May Annual style on a Pär Lindström Regional style map to depict three journeys on that map. This is exactly how I imagined the style to be used.
Continue reading »
1 Comment
ralf | May 23, 2013 | community, Maps of the Month, user maps
It’s time for our monthly look at what great maps the ProFantasy user community has produced. Let’s see what everyone has come up with!
Joachim de Ravenbel is back with this beautiful battle map of Hanin’s Chapel.
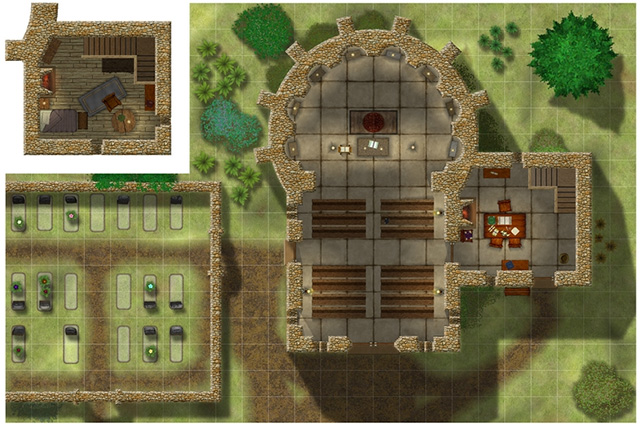
KROM delights once more with his Dioramas models plus floorplans. See his Mausoleum and the Kothian Houses:
Continue reading »
3 Comments
ralf | April 21, 2013 | battle map, Deadlands
I created another battle map for our ongoing Deadlands Reloaded campaign: A city block from Chinatown in the Weird West’s Portland. The group hasn’t reached this part of the story yet, so no battle has taken place, but I hope it will next session.
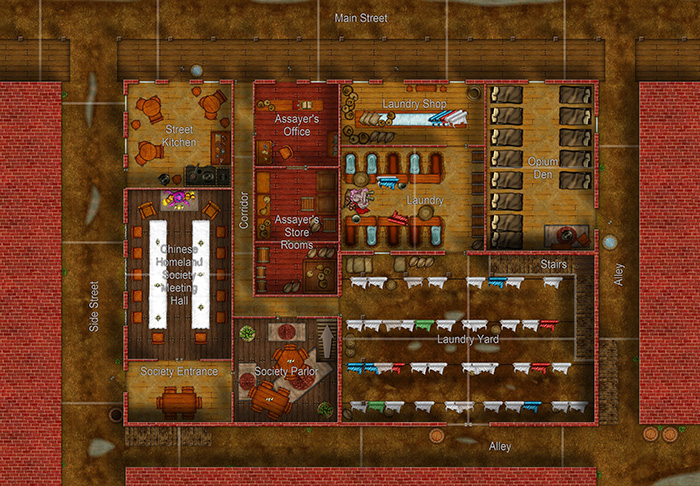
For this map I used an area movement setup instead of the traditional gridded layout. Adapted from the FATE rules, this is a user-suggested rule for Savage Worlds that I want to try out. You can download this version as a full-size A1 pdf by clicking the image above. If you prefer the traditional 1″ square grid, click here.
This map uses symbols and textures from Dungeon Designer 3 and Symbol Set 2: Fantasy Floorplans. You can download the original CC3 file here (both add-ons needed to properly view it).
1 Comment
ralf | April 15, 2013 | battle map, community, Maps of the Month, user maps
I always look forward to putting together the month’s collection of user maps from the ProFantasy forum. It’s always a parade of beautiful and interesting maps. Let’s have a look, shall we?
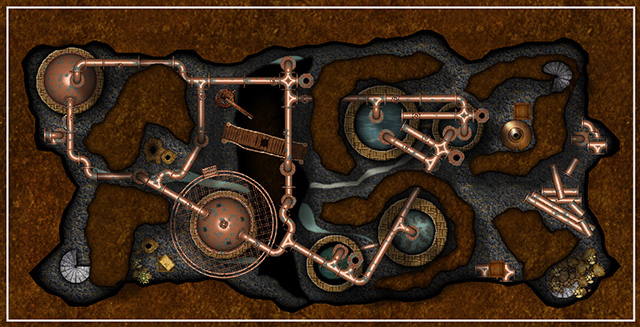
KenG really took my breath way with his Cistern Caves. The pipes and cisterns look extremely lifelike and were something I hadn’t seen done in CC3 yet.
Continue reading »
Comments Off on User Maps – the April round up
ralf | March 19, 2013 | community, Maps of the Month, user maps
It’s time again to admire all the user maps that have popped up in the ProFantasy forum during the last four weeks.
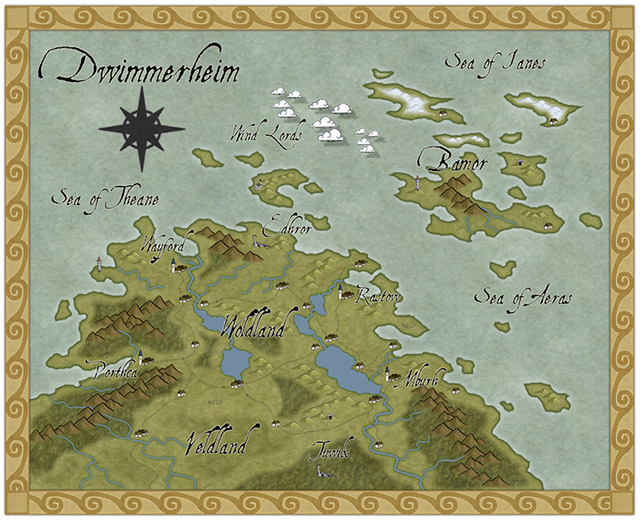
Taking up a recent Annual issue (Pär Lindström’s regional style), Modric created this beauty of the Dwimmerheim region.
Continue reading »
1 Comment
ralf | March 1, 2013 | Annual, overland, user maps
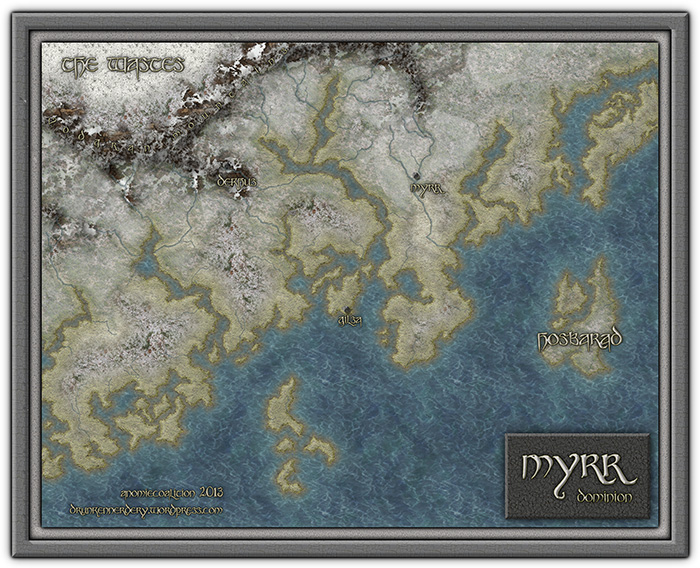
We’ve just released the March Annual issue: Flavio’s Myrr Overland style is now available as a download for the Annual subscribers.
His beautiful and unique overland style is based on intricate bitmap texture and shaded contours, as you can see from this sample:
You can subscribe to the current Annual here.
Comments Off on Cartographer’s Annual: Myrr Overland style released
ralf | February 21, 2013 | community, Maps of the Month, user maps
We’re a bit earlier this time around, so I don’t have a full month of user maps to round up. The tally is still very impressive, as well as the skill and imagination of our users.
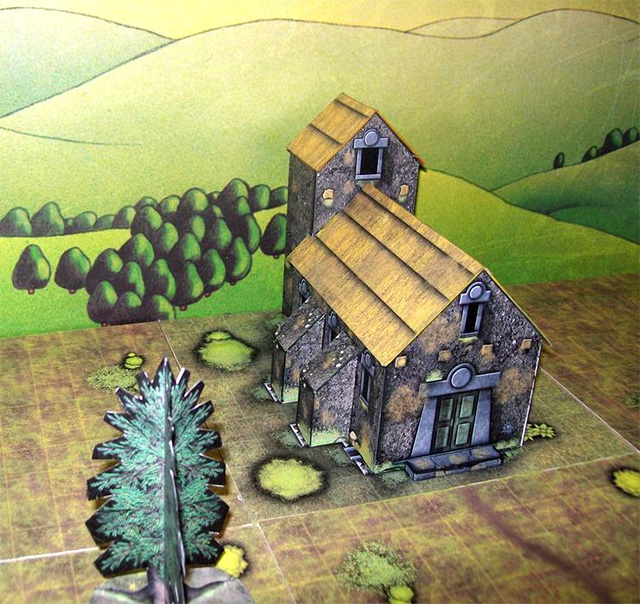
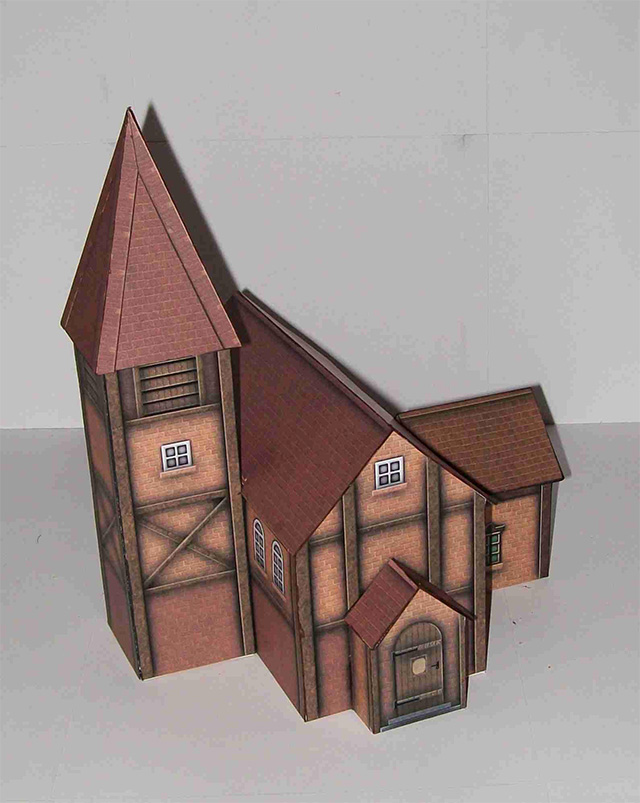
Krom continued his series of Diorama buildings created from DD3 resources, with this beautiful village temple.
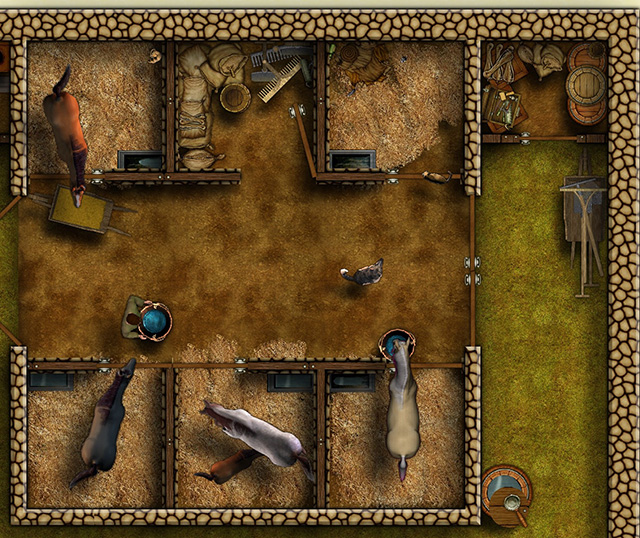
KenG drew this beautiful floor plan of some manor house stables, including artwork from DD3, the CSUAC and the Dundjinni forums.
Continue reading »
2 Comments
Simon Rogers | January 30, 2013 | effects, overland, Tutorial
[Ed’s Note: Let us know if you like this style, and with Flavio’s permission, we’ll create an Annual from it]
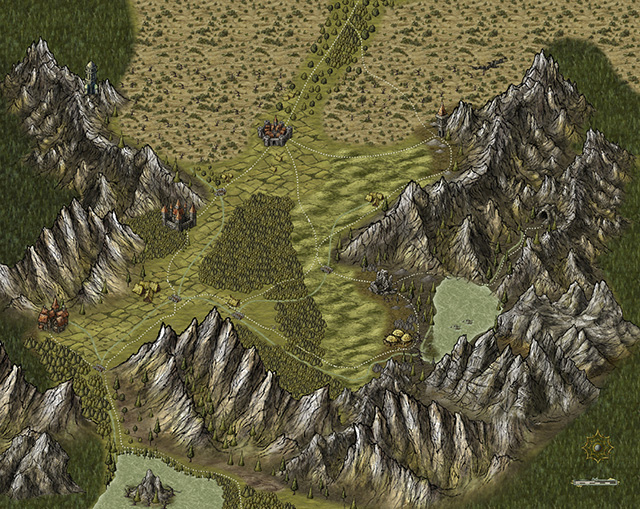
My fiancée recently asked me if it would be OK to make a Viking character for my Al-Qadim campaign. I thought about the role playing possibilities for a moment: Viking gets lost at sea en route to pillage and plunder; Viking gets shipwrecked in hostile desert environment; Viking PC makes for a very interest game indeed. I then thought about where such a Viking would come from in my world and set about creating a map of his home.
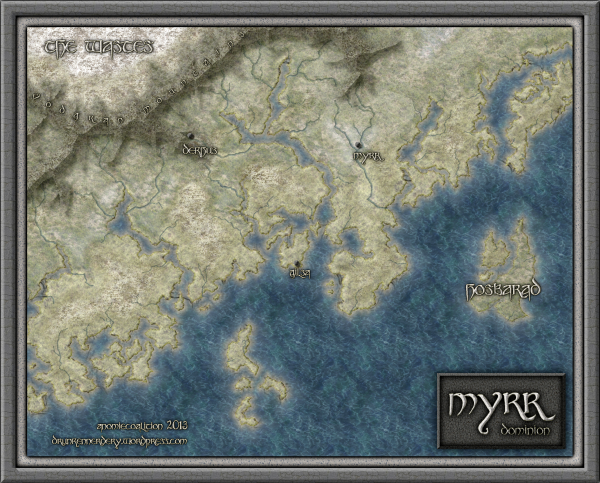
Myrr is a semi-arctic region largely inspired by Scandinavia, Iceland, and Alaska. I spent a great deal of time looking over maps of their fjords and river systems in the hope that I could create something similar and believable in my own map. After an hour or two tinkering around with the fractal line tool (adding a river here, indenting land mass there, etc), I finally had a landmass and set of islands I could be happy with.
The next step was to create the mountain range. I first drew the main ridge of the mountain and all the little ridges that branch off of it with the smooth poly tool. This is what the looked like without effects on.
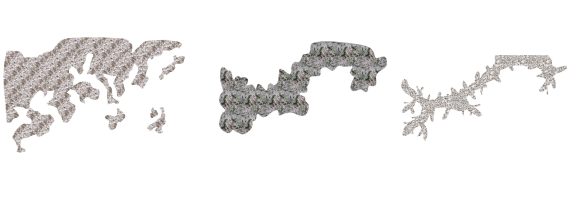
I gave it a rather long and dark wall shadow, a deep edge fade inner (with 75% inner opacity), and a large lighted bevel effect (so that the two sides of the bevel met in the center of the polygon). I then added a Mountain Hills sheet that encircled the range with a smaller edge fade inner and lighted bevel effect. Next, I added a Mountain Base sheet that encircled the Mountain Hills (also with a smaller edge fade inner and lighted bevel effect.) Because I wasn’t thoroughly happy with the colors that were coming out, I finalized it with a Mountain Cover sheet. This shows the details of the effects:

And this is the final mountain range:

As you can see, I also used the Mountain Base sheet to layout my hills. I further added a Hills Base sheet that encircle these hills and had a deep edge fade inner to give the illusion of height. From there I added some forests (very subtle), rivers, text, (about a dozen assorted sheets to get the ocean, landmass and desert looking right) and called it a day. All of the textures came from Herwin Wielink annual and CGtextures.com.
This map was a great deal of fun to make and I learned a new technique for mountains in the process. Of course, the best part is now crafting a history about this region to help fill in the gaps of my fiancée’s character’s back-story. Although I’m far from done, you can check what I have so far (along with a full resolution version of the map) at my blog.
9 Comments
ralf | January 30, 2013 | community, Maps of the Month, user maps
We’ve gone into 2013 and our community shows no sign of letting up with the barrage of wonderful user maps. Here’s the roundup for January!
KenG was inspired by KROM’s wonderful close-up maps/paintings done in the Herwin Wielink overland style. The result is this beautiful local map.
Continue reading »
1 Comment
Simon Rogers | January 18, 2013 | dungeon, Floorplan
[This map was created and this article written by forum user anomiecoalition.]
Mapping has become one of my favorite escapes from the drudgery that is graduate school. Whether it’s developing a mystical environment from scratch or recreating a classic adventure, I look forward to spending a few hours playing around with CC3. Lately it’s been the latter, and I’ve found quite a few gems mining my mini-library of TSR adventures.
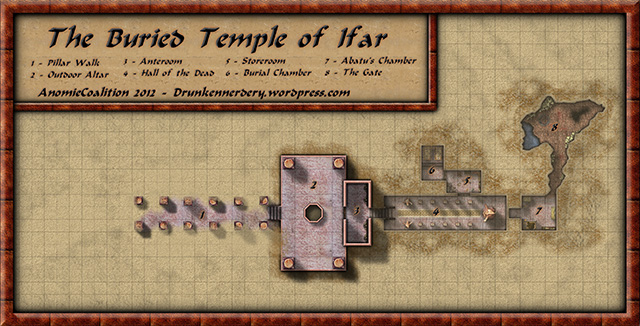
This particular map is a reproduction of a “Buried Temple” encounter in the “Master of the Desert Nomads” module (X4). Our adventures leave the comforts of a desert oasis to investigate a recently unearthed buried temple – Once inside they’ll discover all manner of nefarious creatures, but should they survive, the rewards will be well worth the effort.
The most challenging aspect was trying to find a way to depict areas that are both above and below ground on the same map. I spent a great deal of time (and got lots of great suggestions from others on the Profantasy Forums) messing with my underground section. After creating my underground walls, I multipolied the area outside the walls and placed that shape on my Background sheet (which sat below my wall sheet on the list). From there I applied a subtle edge fade inner effect so that the sand was slightly covering the wall. I then multipolied the area inside my underground wall, applied my sand fill to that shape, and then added a transparency effect to that sheet. My hope was that these two techniques would give the view the impression that this area was underground.
After that, it was just a matter of dressing my dungeon utilizing various symbols from the CSUAC and textures from CGTextures.com. I also created a bunch of sand dune sheets (edge fade inner and glow effects) to muddy up the background. I’d be lying if I said that I was completely satisfied with the final product, but I think its human nature to demand more of yourself. I made a lot of mistakes with this map, but I learned even more. ..And I can’t wait for my next opportunity to start the cycle all over again.
If you’re not tired of my Desert Maps, you can see more in full resolution on my blog: http://drunkennerdery.wordpress.com/
1 Comment