[Ed’s note: this great tutorial introducing editing was written by new CC3+ user R A Jacobs who is on a mission to learn CC3+ – follow his journey here. It features the first map by another brand new CC3+ user Kalthorine. See his original post on the forum.]
 Before We Start…
Selecting something on a screen by pointing and clicking is a very common activity that you probably do hundreds of times a day on a computer. When you think about it, it’s like picking things up with your fingers. You move the mouse to the icon that you want to open, or move, or delete; you select it by clicking on it and then you do some action. Modern User Experience Designers have made selecting objects on a screen very easy; often times, you only need to click within the vicinity of an object in order to select it.
And, what I learned this weekend, is that that is one of the reasons why you fail when you try to do just about anything in Campaign Cartographer.
Whaaaaaat?
Before you learn to do anything in Campaign Cartographer, you have to remember a few things:
- This is professional software. While some people report having no problems at all picking up the tool, for most, there is a learning curve; you have to both unlearn old habits and pick up new ones. In some cases, there is a level of precision that is required in order to accomplish a task.
- This is CAD software. As I’ve learned, CAD software works opposite of the way you are probably used to working with most desktop applications (at least on Windows). Instead of selecting something on the screen and choosing what to do with it (noun->verb: “This mountain, delete”), CAD software asks you to tell it what you want to do and to what objects you’d like to do it (verb->noun: “Delete this mountain”). The advantage of this approach is that you can execute the same action over and over quickly.
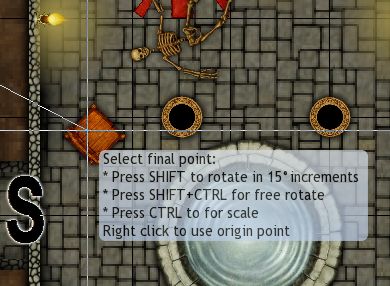
- Watch the Command Line (CC3) at the bottom of your screen. The Command Line is how CC3 communicates with you and provides hints on what you need to do next. CC3+ adds a new feature called a Command Prompt that provides more detailed instructions which float near the tip of your pointer to reduce the chance that you’ll miss them. A great feature when you are learning this tool!
- An entity is an element, object, symbol, line, whatever on the map. Anything drawn in the Drawing Window is an entity. Keep that in mind.
Overview
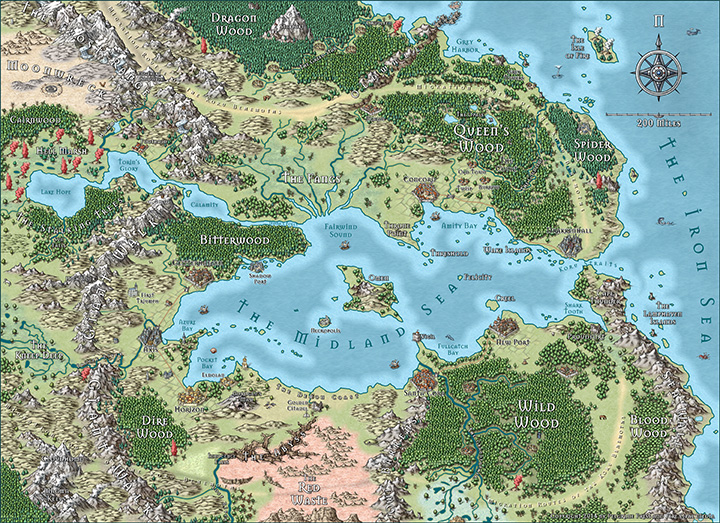
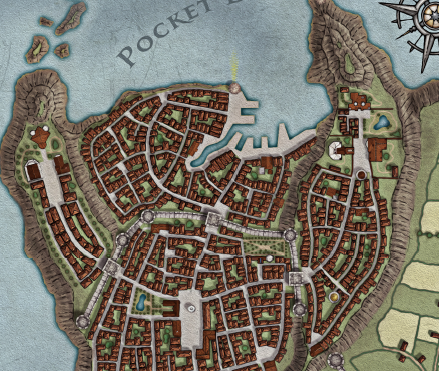
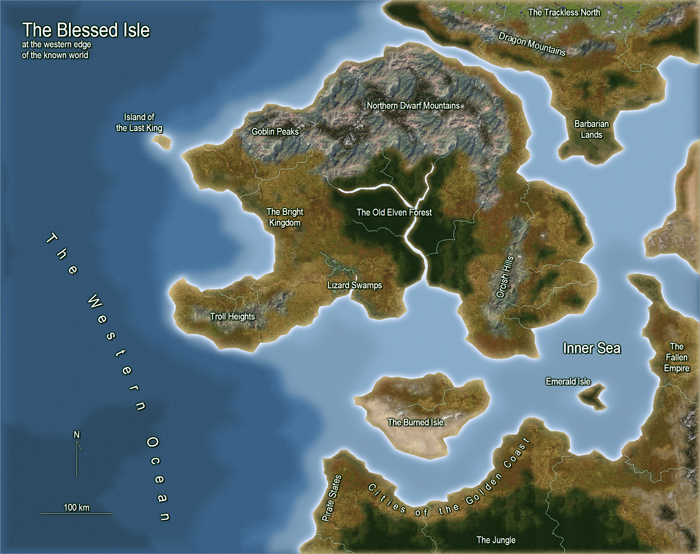
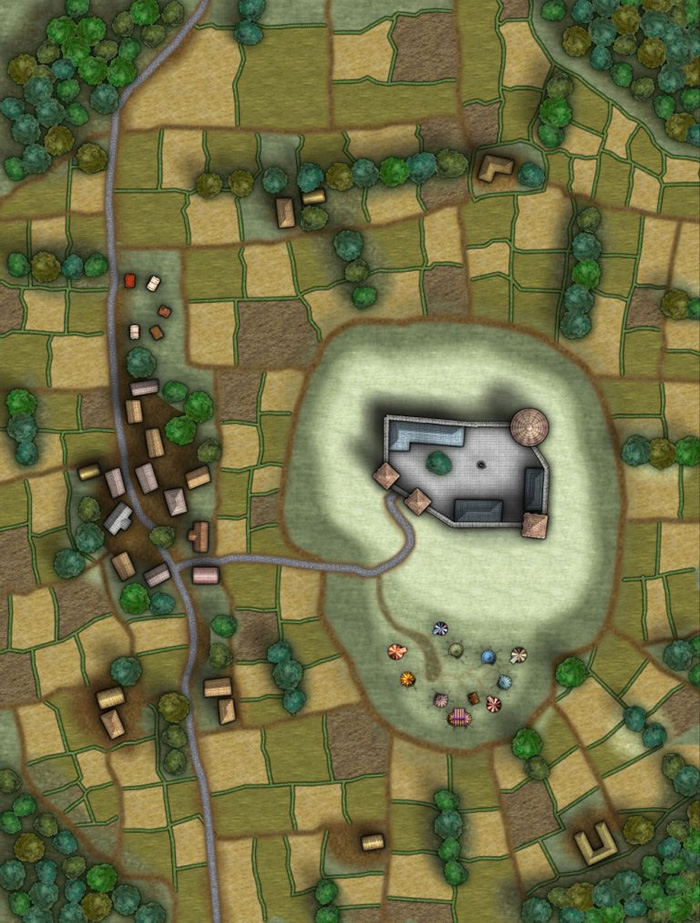
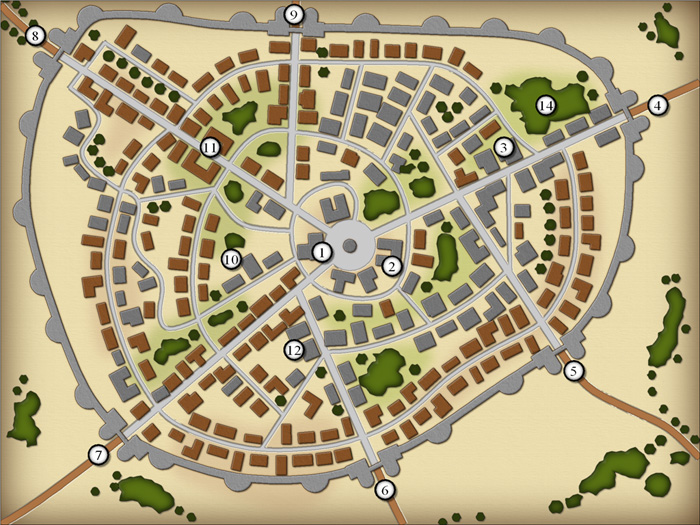
 For this post, I’m going to use the Khalkaeareon map created and posted by Kalthorine to the ProFantasy Community Forums. Be sure to grab the map, not just the image of the map.
There are many ways to select something on a map in Campaign Cartographer 3+. I tend to think of these options in terms of “Fundamental” and “Advanced” techniques.
Over the next two posts, we are going to look at what I consider to be the “Fundamental” select techniques. Part 1, today’s post, will cover:
- Select All
- Select by Layer
- Select by Window
- Select by Clicking the Edge of an Entity
- Deselect an Entity
In Part 2, we will take on:
At some point in the future, we’ll cover the following “Advanced” techniques. I haven’t yet had a lot of reason to experiment with these so I want to better understand the mapping situations best solved by these tools:
- Select by Color
- Select by Line/Fill Style
- And, Or, Not: Adding to or removing from a group of selected entities
Let’s get started…
Select All
Why You May Want To Use This Approach: You want to keep the template, tools, etc. that you have created for a particular map but you want to start the entire map over from scratch. In more advanced cases, you want to keep everything on two or more layers but get rid of everything else.
By far one of the easiest ways to select entities in Campaign Cartographer is to just select all of them. For now, let’s just assume you want to erase everything on a map and start over – but you don’t want to pick a new template or anything like that.
- Click the “Erase” button from the”Edit” toolbox to the left of the Symbol Catalog.

- Move your cursor to the Drawing Window. In CC3, take note of the Command Line, it reads “Select Entities (0 picked):”. In CC3+, you get this same text on both the Command Line and Command Prompt.
- Right-click. Select “All” from the pop-up menu.
 Every entity on the map is selected. The invisible outlines are presented in pink so you can see what you have selected.
- Right-click. Select “Do it” to execute the “Erase” command (or whatever command you selected).


The goal of this tutorial is not to teach you how to erase entities, just select them. We’ll leave it there.
Select by Layer
 Why You May Want To Use This Approach: You want to move everything on a single layer to a different layer; you want to erase everything on a single layer.
Next to Select All, selecting everything on a layer is easiest.
Over the weekend – you know, when I supposed to be making maps not learning about “Select” – Select by Layer came in handy.
I was following the Campaign Cartographer 3+ User Guide Tutorial on “Converting Your Old Maps” (pp. 84-86) and I kept getting stuck on Step 6. By Step 6, you’ve loaded up and scaled a bitmap or PNG image of your old maps when you discover that your old map is just a bit smaller than what you want your new map to be so you’ve got to move and scale the old map. You are going to do this by first aligning the inside corners of the two maps. To do this, you need to select edge of the bitmap (“With the crosshairs, click in the lower left corner of the old map.”).
I could not get it done1. It. was. so. frustrating.
It is, in fact, my inability to select a bitmap that led to the creation of this post. Since the bitmap was on its own layer, a very simple way to have accomplished this would have been to Select by Layer.
To illustrate a practical use of this Select approach, let’s say you want to move everything from the MINERALS/MOUNTAINS layer to another. To make a change like that, the tool you want to use is the “Change Properties” tool.
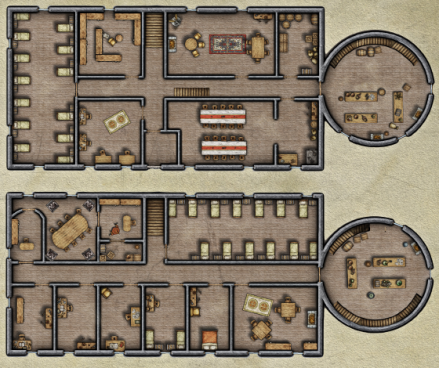
- Click the “Change Properties” button from the”Edit” toolbox to the left of the Symbol Catalog. If you look at Figure 1, above, it is the button immediately to the right of the Erase button.
- Move your cursor to the Drawing Window. In CC3, take note of the Command Line, it reads “Select Entities (0 picked):”. In CC3+, you get this same text on the Command Line and, additionally, in the Command Prompt along with more detailed instructions. See Figure 2, above. It will be similar.
- Right-click. Select “Layer” from the pop-up menu.
- Right-click. The “Select Layer” Dialog window will pop-up. Click the furthest left box on the MINERALS/MOUNTAINS row and click “OK”.
- Alternatively, if you know the name of the Layer you want to select, you could just type its name.
- In CC3, you type the Layer name on the Command Line
- In CC3+, as you type, the Layer name will appear in the floating instruction text near your pointer and on the Command Prompt.
- Every entity on the Layer is selected. You can verify this two ways. First, the invisible outlines are presented in pink so you can see what you have selected, just like in Figure 3, above. Second, the Command Line reads “Select entities (287 picked):”. If you have CC3+, the floating Command Prompt reads “Select entities to change properties [287 selected]:”
- Right-click. Select “Do it” to execute the “Change Properties” command or whatever command you selected.
Once again, we aren’t really learning about moving entities between layers so we are going to leave off at this point and move on to the next task.
Select by Window
Why You May Want To Use This Approach: You want to select more than one entity within a specific area of your map in order to move the group to another area of the map. You want to select a tight grouping of related objects and change their properties. You want to select a tight grouping of related objects and delete them. Lots more.
Select All and Select by Layer are very ham-fisted tools. They select a lot of entities without a lot of finesse. They have their place but, most of the time, you are going to want to work with a few entities at a time.
To start to get finer control over what you select, you can actually define a Window to select multiple items within an area at the same time. To use this technique, you select two points on opposite corners of an imaginary rectangle (“Window”). Everything inside the window is selected.
For this select exercise, let us assume that we want to move a the cluster of towers from near Drakenhold in the Upper Left Corner of the Khalkaraeon map.
 Click the “Move” button from the”Edit” toolbox to the left of the Symbol Catalog. See Figure 4.
- Move your cursor to the Drawing Window. In CC3, take note of the Command Line, it reads “Select Entities (0 picked):”. In CC3+, you get this same text on the Command Line and, additionally, in the Command Prompt along with more detailed instructions. See Figure 2, above. It will be similar.
- Right-click. Select “Window” from the pop-up menu.
- You are now going to define a “box”. Pick some point to the upper left of the group of entities you want to select and click.
- Pick a point to the lower right of the group of entities to select. As you move your cursor down and to the left, a “box” will grow around the group of entities you want to select. When the box surrounds the entities you want to select, click again.
- Every entity intersected by the box will be selected and will either turn pink or be surrounded by a pink border. See Figure 5.
- Right-click. Select “Do it” to execute the “Move” command or whatever command you selected.

 There are some gotchas that go along with this approach. This approach works on the concept of “intersection”. Any entities that fall within the boundaries of the Window you define are going to be selected. Because symbols frequently overlap, there is a good chance that you may pick up entities that you did not intend. In Figure 5, I was trying to select just the three towers towards the middle of the image. I got a lot more than I wanted.
So what can you do? Here are a few ideas:
- Reserve this approach for areas of the map where there are not a lot of overlapping symbols or other entities.
- Zoom-in close and use very small Windows to limit how many symbols potentially overlap your window.
- Deselect the entities you did not intend to grab.
- Freeze the layers containing the entities you do not want to select.
Select by Clicking the Edge of an Entity
Why You May Want To Use This Approach: You want to execute a command on one entity – most likely to delete or move it. You want to execute a command on a few entities from among a group of entities – most likely to delete or to move them.
Now we are zeroing in on it. You want to select a single entity and execute a command on that entity. To do this, you have to click on the edge of the entity. Ah…but that’s the rub: Where is the edge of the entity? You keep clicking the symbol you want to select and all you get is a cross-hair and you wonder, why can’t I pick up this symbol?!
If you look at either Figure 3 or Figure 5 above, you will see a pink colored box around the entities that are selected. This is not the edge of the entity. Let’s call this the “border”.
If you look at any sufficiently styled symbol, you will find a lot of edges within the icon. Again, this is not the edge of the entity. Let’s call these the “lines” that define the symbol. The edge of an entity is a line.
The core problem is that you expect Campaign Cartographer to work like your Windows machine. In Windows, you click in the center of an icon on the screen to use it. That’s not how it works in Campaign Cartographer (remember those habits I said you needed to unlearn in the Overview, above? Yeah. This is one of them.)
The edge of the entity is defined by the outer lines of the symbol regardless of where the border of the entity may be. To select by clicking the “edge of an entity” you must click the outer lines of the entity. Clicking a line/edge in the middle of the entity will not select the entity.
In my (albeit limited) experience, it is much easier to select a single entity by working up close. For this particular select exercise, let’s us assume that you want to move Drakenhold castle in the Upper Left corner of the Khalkaraeon map.
 Find Drakenhold castle on the map. It is in the Upper Left corner of the map.
- Zoom in. You can do this from the View -> Zooms -> In By 2 menu item, the Zoom buttons on the upper far right toolbar, or by right-clicking and choosing one of the Zoom options. Get in close. See Figure 6.
- Click the “Move” button (see Figure 4, above, if you are not sure where the button is).
- Move your cursor to the edge of the castle and click. The symbol or entity should either turn pink or be surrounded by a pink border. See Figure 7.
- Look at the Command Line and Command Prompt (if you are using CC3+). The Command Line should read “Selected Entities (1 picked):”. The Command Prompt should read “Select Entities to Move, Scale, Rotate [1 picked]:”.
- If you want to add more entities to the group, repeat Steps 1-5 until you’ve selected all the entities you want to manipulate. Keep an eye on the Command Line / Command Prompt to ensure that you are only picking up the entities you expect to pick up.

- When you are done selecting individual entities, right-click and select “Do It” to execute the “Move” command or whatever command you chose.


In Step 5, if the “Selected Entities” count is 0 or greater than 1, you’ve either failed to select the castle or you picked up something in addition. You need to deselect and try again.
Deselect an Entity
Why You May Want To Use This Approach: Using another approach, you’ve selected one or more entities that you did not intend to select. Before you complete your command sequence, you need to reduce the number of entities selected.
As you seek finer and finer control over the number of entities you want to select, you are going to select entities that you did not intend to select. Before you right-click and select “Do it”, you need to clean up the collection of selected entities.
First, double-check the Command Line and the Command Prompt to see how many entities are currently picked. If you think you’ve got 1 but the command line says you’ve got more, you’ve got clean-up to do.
There are two basic ways to deselect an entity. You can choose to cancel the command or deselect entities one at a time.
Cancel the Command
- Complete Steps 1-6 of Select by Window but only try to select a few entities.
- Right-click and select “Cancel” from the pop-up menu.
- The items are no longer selected.
 But wait! If the items are no longer selected, why are they still surrounded by a pink border? To save resources, the Drawing Window does not refresh after every command. If you still see pink borders, click the Redraw button to the upper right (see Figure 8), use View > Redraw or type CTRL-R. If the pink border does not go away, then you did not deselect the entity.
Deselect Entities One At A Time
- Complete Steps 1-6 of Select by Clicking the Edge of an Entity. Select 3 entities.
- With three entities selected, press and hold the CTRL key while you select one of the 3 entities you just selected.
- The Command Line count of Selected Entities should decrease by 1.
In general, any time something doesn’t quite look right on the map, it is probably a good idea to “Redraw”. To clean up my drawing left-overs, I find myself doing this frequently after deselecting entities and executing other commands.
My gut tells me that if I want to get good at Campaign Cartographer – to really master it – I need to spend time really learning these fundamental skills. Just from playing around with these techniques and then writing them down for your benefit has been extremely helpful to me.
How about you? Did any of this help? Do you have a trick for selecting objects within CC3 that gets you out of tricky situations? What is it? Leave a comment and tell me about it.
- I wanted to do it “the right way” and follow the instructions verbatim so I could be certain I was learning the skill required. Yeah. Don’t do that. It doesn’t matter. The upside, is that I learned a lot anyway…about other ways to select items.