Community member soldyne created this map of the “World River” as his very first map in CC3.
Henrie61 drew this “quick and dirty” town map to try our the Jon Roberts Cities style and was impressed how quickly you can create a beautiful map this way.
The Jon Roberts Cities style seems very popular as shown by the “Yellowmire” map created by Dargurd. The unusual, swampy location of the city comes acress very well.
In a change of pace Modric created this black and white map of “Avern” and added a great parchment style filter for a great player handout. The style used is from the Cartographer’s Annual Vol 2.
And last but not least, forum member anomiecoalition drew this neat little Al Quadim-flavoured dungeon, using resources from DD3, the CSUAC art collection and Dundjinni forums.
Kudos to all the great maps our users have been creating!
The September issue of the Cartographer’s Annual 2012 was released last Saturday. It lets you create maps in the beautiful style of the 13th Age world map by Lee Moyer. 13th Age is the upcoming new role-playing game by Pelgrane Press.
The August issue of the Cartographer’s Annual 2012 has been released. It contains a 10-page introduction and tutorial to the Cut menu and its commands, a way to cut out and export a section of a larger map in CC3.
We’ve also added previews to the September and October issues to the Annual website. Check out the September issue and the Gallery page for some previews of the beautiful map included in Pelgrane Press’ upcoming rpg 13th Age (by Rob Heinsoo and Jonathan Tweet).
If you are a subscriber, you will notice that we’ve changed the way the download for the Annual works. For details, please check here for details.
Comments Off on Cartographer’s Annual – August issue and previews
Several years ago user-created bitmap artwork from around the web (specifically the Dundjinni forums) was collected into one awesome resource package – called the CSUAC – and made available for the users of several graphics programs, among them CC3. Unfortunately this resource was lost to CC3 users a while ago, and license restrictions did not allow us to make it available again.
But fortunately we’ve now found a way to make the resource available to CC3 users while honoring the license, and Gerri Broman (Shessar on the Profantasy forum) and Mark Oliva from the Vintyri project put it into practice. Here are Gerri’s instructions from the Profantasy forum:
CSUAC for CC3 Installation Instructions
Before I get into the installation procedure for the package, I want to first point out that if you already have the CSUAC there is no need to reinstall since there are no new symbols. However, the directory structure is different from prior versions, so the two are not compatible. What this means is that any maps using symbols from prior versions will show red X’s for the symbols (the reverse is true as well). This is because the new CC3 version of the CSUAC is using the file structure and files from the Fractal Mapper 8 version of the package.
Also, please note that these symbols are not full fledged CC3/DD3/CD3 symbols. That is, they are not smart symbols, nor do they use random transformations, shading, collections, etc. They are simply the PNG files and associated CC3 catalogs.
2. Extract the file BL_FM8_Fills.zip into the CC3\Bitmaps\CSUAC Fills folder.
3. Extract the files BL1_FM8.zip through BL8Pt2_FM8.zip into the CC3\Symbols\CSUAC folder.
STEP 3: Adding Menu Buttons for the CSUAC
1. Navigate to your root CC3 folder
*If you don’t have a fcw32.imn file in this directory
Copy the fcw32.imn file from CC3\Menu\csuac_menu into your root CC3 folder.
* If you do have the file fcw32.imn in the root CC3 directory
Navigate to the folder CC3\Menu\csuac_menu
Open the fcw32.imn file using Notepad.
Append (copy/paste) the contents of this file to your existing fcw32.imn file in the CC3 root directory.
Make sure you don’t leave any empty lines inside the file, but do make sure there is a line break after the last line of content, or CC3 will crash on startup.
2. Start CC3. Click the screen tools button (Hammer icon at the bottom of the screen), and turn on “Custom icon bar 3”. I have mine placed to the left.
3. If the new toolbar shows up blank, just restart CC3 or click on one of the “Add-on” buttons in the toobar. This will reload the menu.
Joseph Sweeney has posted a couple new video tutorials on his YouTube channel. These cover some more advanced techniques like creating your own symbol catalogs from PNG bitmap files and adding new catalog settings to your buttons in CC3.
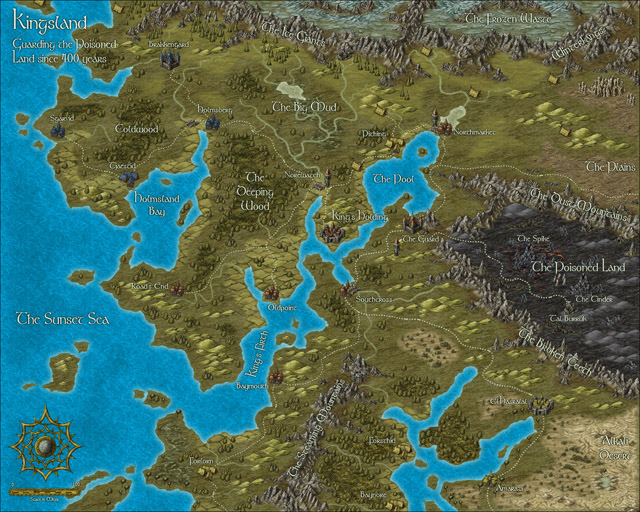
This time I thought it was time to make a tutorial on how you can make a convincing overland map. This will be more of an overview tutorial on how I think and plan when I make a map, so it won’t be very technical. This means that you can use this tutorial regardless what program you use when you map, even though I in the tutorial will use a map made in CC3 as a reference and example.
The first thing to take into account when you start an overland map is the landmass. How much of the map will be water and how much will be actual land? This is probably the most important step in your map because it will set the boundaries for what the end result will be. So already here I’m having a quite clear view of where I want to go with the map, shall the map be land based, island based or something in between.
Below you see my map “Sagorike”, that I’m using as an example in this tutorial, with only the landmass viewable. I’ve also written some things on the map that you can have in mind while drawing the coastline.
A good thing to do before starting on your landmass is to look at the real world (Google earth is great for this). If you want a lot of fjords, have a look at Norway, Island based, look at area outside Stockholm for example, and so on. It is always good to find inspiration in the real world. It will make your map look more believable, and believable maps tend to look good.
However when I make maps of worlds the most important thing for me is that they look good and in some part convincing. It doesn’t matter if the world doesn’t work geologically or physically, as long as it looks convincing. To make it look convincing you have to get the things right that the majority of people can spot, like rivers, they will NEVER split downwards, lakes, there is always only ONE outflow, or deserts, make sure that you place them in a way that it looks probable that no rain will get there, and so on. If those small details are correct it is more likely that the viewer will believe in the whole map, regardless if everything in it is possible according to our physical laws or not.
That is all for now, in the next post we will start by placing the mountains in the map.
Recently a particularly large number of very nice overland maps has appeared on the Profantasy forum – and they were all done in the April’s Annual style by Herwin Wielink. Apparently the style is especially well-suited for creating quick and beautiful maps. Here is a little gallery:
Local Region Map by community member Modric
The tidally-locked world Thraalion by community member Clercon
Map of the Whalebones Islands (Forgotten Realms) by community member Eranthius
Map of the Neverwinter Region (Forgotten Realms) by community member Dargurd
Batazan Map by community member FarsightX3
Sagorike map my community member Clercon
If you – like some members of the Profantasy crew – prefer your seas more blue and balmy, here is a neat little trick to adjust your ocean color: Add an RGB Matrix effect to the BACKGROUND sheet, using the values shown below.
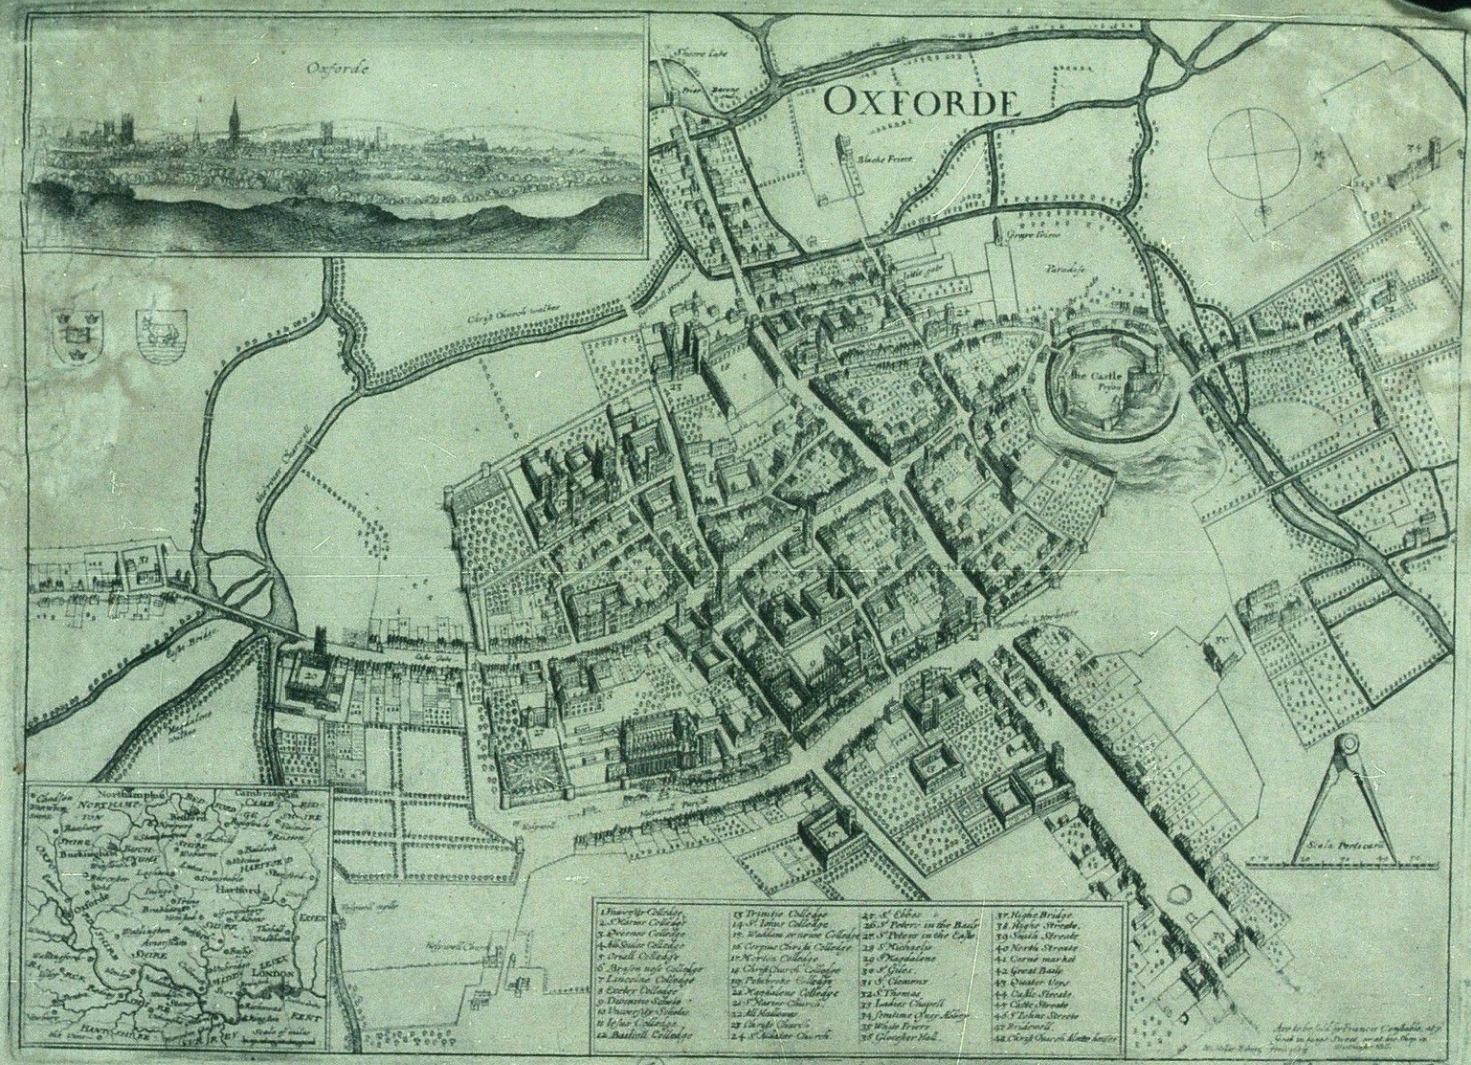
Up to now we’ve mostly been working inside the city walls, where space is short and buildings necessarily packed
Historic map of Oxford in 1643
closely together. We’re now going to turn to the area outside the walls. In this installment, we’re going to turn back to some theory.
First we need to talk about why businesses decide to set up outside the walls of the city. After all, they are forgoing the protection that walls bring, so there must be some good reasons for it. It turns out the reasons are pretty simple:
Avoiding authority: This is monetary, avoiding taxes, but also includes regulation, attention of the town watch, even to avoiding the prying eyes of neighbors. The city’s authority ends with the city walls, and some people find their business flourishes where there is less oversight.
Accessing markets: Gates into the city are notorious choke points for people entering the city. The gates typically only open at certain times, guards ask questions, and just the physical size of the gate all conspire to leave large numbers of people waiting outside to get in. And where there are large numbers of people waiting or stranded, there is money to be made selling goods and services to them.
Space: In many cities, space is at a premium. So businesses that require lots of space such as cattle markets, or that need space from neighbors, such as tanners, will often set up outside the city walls.
[Editor’s note: Forum member Mateus Buffone posts about his excellent Panorica map]
Some days ago Simon Rogers asked me if he could use my map as “The Map of The Month”. When I read it, I could not believe it. I started the hobby last year and I am still learning the tricks of the trade, so it’s an honor to have a map that I made posted.
This map is named Continent of Panorica and I did the first version of it in less than an hour for a RPG game that I would begin on the next day. The first thing that I neded was a style that would fit well in a continet map and that have a “fantasy” feel, as what I wanted was a fast and “cliché” map for a fast and “cliché” world. So I choosed the CA51 Jon Roberts Overland Style that is part of the 2011 Annual.
I generated landmasses in Fractal Terrians 3 until I saw one that would fit my needs. Than I exported it to CC3 and fractalized a little more. After that I used the Land Default tool from the style and drew the islands, then used Fractalize on them to achieve a nmore natural feel. The next step was to place the mountains ranges. I was not concerned very much with realistic geology but I did not want to explain all my world with “magic!”, so I placed them first near the coast where I thought others continents would exist if I some day did the whole world. Then I placed the central chains as I needed a desert for my game. For the first version I only needed the central region so I placed some of the major rivers of the continent and dotted some settlements near the desert to form a pseudo-Arabian/tuareg region and called it a day.
But at that point I was in love with the project and wanted to transform it in my fixed fantasy map for the kind of game that I was running (a GURPS Dungeon Fantasy campaign). So I needed other regions and more details. So I begin to really think about the whole image: what cultures lived there, their society and political organizations. I decided to made the banners of the diferent kingdoms and others political organizations. For it I used the CA15 “Heraldry” from Annual 2008 and exported then as FCW entities to my continent map. I used some symbols found on the Map & Catalog Library in the ProFantasy home page. First I had a lot of dificults to implement the shields because messing with sheets is not very easy, but when you learned what to put where they are a big time saver! For the desert, florest, farmland and scrubland terrain to work on this map I had to rescale then for just 50% of their original size (this tip was gave to me by Simon himself).
[To rescale a bitmap fill style:
1. Click on the Fill Styles Indicator, the Bitmap Fills tab, and find the texture on the Fill Style Name pulldown.
2. Reduce the Scale Width and Height (maybe to 50%) and OK.
3. Try again until it looks right.]
Another point of interest was the underwater setlements (Forte do Sino inside Terras Alagadas and the whole southeast region). I spend a big time with then and in the final I only neded of an Transparency effect. And I think that this is one of the most import aspects of CC3. When you find good effects and know how to create and manage sheets for each of your maps you can achieve very good results.
I hope that you like my map and if have any suggestion talk with me on the community.


 Several years ago user-created bitmap artwork from around the web (specifically the Dundjinni forums) was collected into one awesome resource package – called the CSUAC – and made available for the users of several graphics programs, among them CC3. Unfortunately this resource was lost to CC3 users a while ago, and license restrictions did not allow us to make it available again.
  The files needed are:
 STEP 3: Adding Menu Buttons for the CSUAC


")

