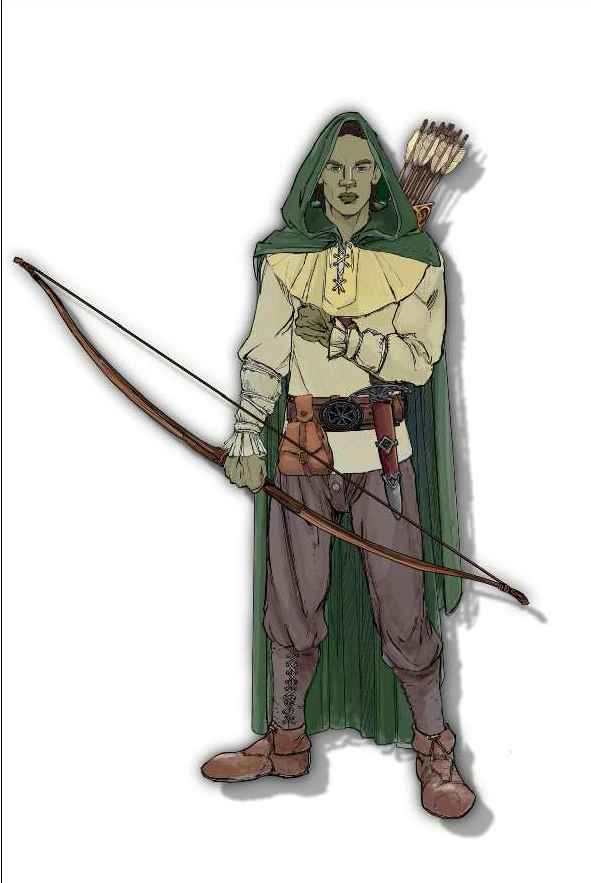
 The Character Artist 3 add-on to Campaign Cartographer 3 is coming soon. As well as portraits for character sheets, you can also create card standees.
Here is a PDF of characters you can download free for your own use.
The Character Artist 3 add-on to Campaign Cartographer 3 is coming soon. As well as portraits for character sheets, you can also create card standees.
Here is a PDF of characters you can download free for your own use.
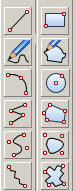
The 16 x 16 icons for CC3+ are completed. My poor eyes!
Monitors have increased resolution, and my eyesight has I’m afraid, gone the other way. I find I’m having to squint at our standard 16 x 16 icons.
You can see the problem here. The first is what icons used to look like on 800 x 600, the second the relative size on my 1280 x 1024 monitor.
800 x 600
1240 x 1024
So, for CC3 Plus, I am working on a new, shiny set of toolbar buttons at 24 x 24, and as it’s a new version, I’m redoing them to support alpha transparencies. For consistency and documentation I am redoing them at 16 x 16, as well. Here is a selection. They still need a bit of polish here and there, and feedback is welcome.
I am deliberately saying nothing else about CC3+ at this time. I’ll update you when I can.
New 24 x 24 icons
Update: I darkened up the icons a little for poor Joachim’s eyes.
Mark Fulford and I formed ProFantasy Software back in 1993. At that time, Mark sold CAD systems (computers with pre-installed software) and I had just finished university. We are both keen gamers, and the idea of combining Mark’s knowledge of CAD with roleplaying to create campaign maps was attractive. The difficulty was finding a CAD program which was even vaguely close in price was the main problem. Enter Mike Riddle, creator of AutoCAD and later FastCAD and EasyCAD. He was willing to take a risk on us, allowing us to have a license to FastCAD at a price which enabled us to resell it to gamers, and only 200 or so licenses all told. We simply removed dimensioning, an essential feature for CAD designers, but not so important for gamers.
Over the years Mike has rewritten the software for his customers, but also taking into account our customers and ideas, improving the interface and functionality for both standard CAD users and cartographers. Next week, for the first time, Mark and I will be visiting Mike in person out in Phoenix, partly to come with new ideas for the next version, but mainly because we’ve never met despite long conversations and creative endeavours over nearly 20 years. One other person who worked with FastCAD is Peter Olsson, who then created most of the code for our add-ons and added buckets of functionality to the core program. Peter has worked in the ProFantasy offices and also with Mike in person, and he’ll be joining us.
It’s a long-delayed meeting, and I’m looking forward to it.
[STOP PRESS: Mike Schley, who has created a new overland style for CC3+ lives in Phoenix, and we’ll be meeting him to discuss future cartography projects.]
Related Sites
[Ed: This is a map created by Rigtje Schootstra, Leviathus on the forum]
Hello everyone!
It’s world map time! These maps are from my project Lion Head. The world is called Eterna.
Below the first map, made with Campaign Cartographer 3 (using the Mercator Style), which is based on my hand drawn map (see below this map). The position of the continents is a bit different than my original drawing, but I had to fit them in the two spheres without shrinking the map too much. Most of the place names and political borders are still placeholders.

The map I drew in Photoshop. Here you can see the names of the continents more clearly.

Enjoy guys.
~Cheers! (Original post here)
One of the things I like most with making maps is when you have to decide where your different countries and cities will be placed. But how can you do this in a convincing way? Where shall you put your cities? As always we have to look at our own history and learn.
If you look back in our history nearly all early cities started out close to water. Before we had good roads waterways were the highways for travel and transportation. To be able to start up a city you needed a surplus of goods and food, so not everyone needed to work. So that some people in the community could start doing the administrative tasks to keep it all together. Living close to water made those things easier to happen.
When that happens a smaller tribal village can evolve into something larger, a city, and in the end a great kingdom or empire. Of course this description is very simplified, but still you can say that this is the foundation behind the growth of a society. Maybe you have to add in things like learning to write, minting coins and technological advancements in building techniques. But without a surplus in production those other things will never kick off.
So how can you use this knowledge in your mapping?. Well when I make my maps I usually wait to plot out borders for countries and their cities until all the terrain is done. When the terrain is done I try to locate places in the map where larger cities might lie. If you look at the example map below I’ve marked out some locations with red circles. Those places are where I probably would put the larger cities in the map.

But not all cities are located close to water, so where should you put the rest of the cities?. To find out this the next thing to do is to draw roads between the large cities. When you’re done have a look at the map for crossroads, crossroads are typical places for a city or town. A place where people travelling to and from different locations meet, and goods can be sold. In the example map below I’ve added some roads and cities at the crossroads.

We now have a good base for our kingdom with some logically planned cities and towns. Next step is to continue adding in more towns, but this time towns that might not feel logically placed in the beginning. When a kingdom continue to evolve other more rare resources gets more and more important, like gold, silver, iron etc. Try to add towns in places close to where they can acquire resources for the kingdom. Also think of how the goods will be transported to the main towns. If you place a small town in the mountains where they mine silver and you have a river close by they would probably found another town next to the river so they easily can transport the silver, instead of transporting it all by the road. In the example map below I’ve added in some towns where they can collect resources.

You can continue this way and add in more and more towns. After adding the towns you add in more roads, more roads means more crossroads that leads to more towns. If you try to build up your map this way the placing of your towns will feel logical which will give you a better and more believing map. And while mapping you might even come up with an idea or two for an adventure.
Reposted from mapping worlds.
 A little late for January, perhaps, but here is the latest newsletter.
[poll id=”5″]
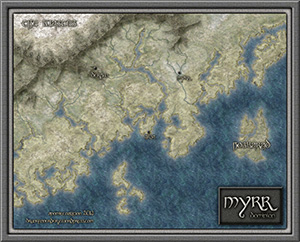
Look at the Myrr Dominion map here.
[Ed’s Note: Let us know if you like this style, and with Flavio’s permission, we’ll create an Annual from it]
My fiancée recently asked me if it would be OK to make a Viking character for my Al-Qadim campaign. I thought about the role playing possibilities for a moment: Viking gets lost at sea en route to pillage and plunder; Viking gets shipwrecked in hostile desert environment; Viking PC makes for a very interest game indeed. I then thought about where such a Viking would come from in my world and set about creating a map of his home.
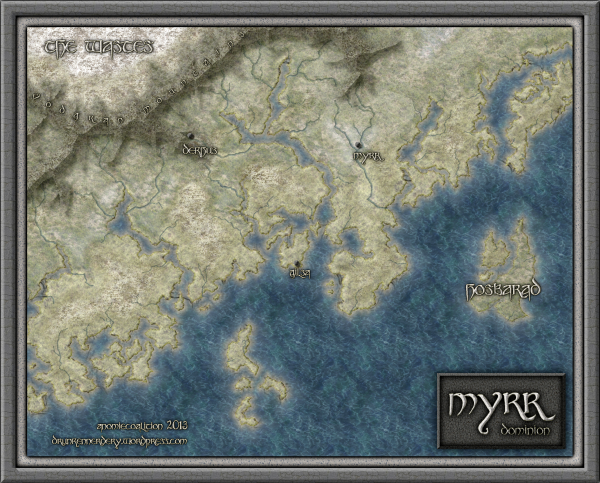
Myrr is a semi-arctic region largely inspired by Scandinavia, Iceland, and Alaska. I spent a great deal of time looking over maps of their fjords and river systems in the hope that I could create something similar and believable in my own map. After an hour or two tinkering around with the fractal line tool (adding a river here, indenting land mass there, etc), I finally had a landmass and set of islands I could be happy with.
The next step was to create the mountain range. I first drew the main ridge of the mountain and all the little ridges that branch off of it with the smooth poly tool. This is what the looked like without effects on.
I gave it a rather long and dark wall shadow, a deep edge fade inner (with 75% inner opacity), and a large lighted bevel effect (so that the two sides of the bevel met in the center of the polygon). I then added a Mountain Hills sheet that encircled the range with a smaller edge fade inner and lighted bevel effect. Next, I added a Mountain Base sheet that encircled the Mountain Hills (also with a smaller edge fade inner and lighted bevel effect.) Because I wasn’t thoroughly happy with the colors that were coming out, I finalized it with a Mountain Cover sheet. This shows the details of the effects:

And this is the final mountain range:

As you can see, I also used the Mountain Base sheet to layout my hills. I further added a Hills Base sheet that encircle these hills and had a deep edge fade inner to give the illusion of height. From there I added some forests (very subtle), rivers, text, (about a dozen assorted sheets to get the ocean, landmass and desert looking right) and called it a day. All of the textures came from Herwin Wielink annual and CGtextures.com.
This map was a great deal of fun to make and I learned a new technique for mountains in the process. Of course, the best part is now crafting a history about this region to help fill in the gaps of my fiancée’s character’s back-story. Although I’m far from done, you can check what I have so far (along with a full resolution version of the map) at my blog.
[This map was created and this article written by forum user anomiecoalition.]
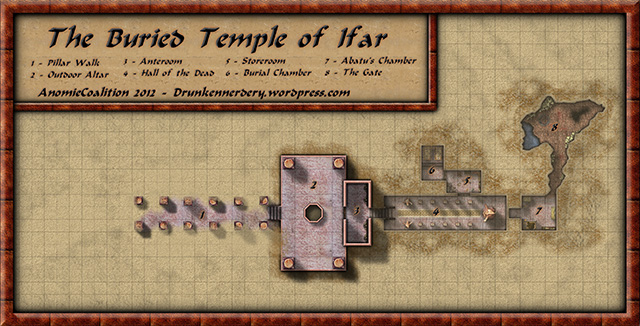
Mapping has become one of my favorite escapes from the drudgery that is graduate school. Whether it’s developing a mystical environment from scratch or recreating a classic adventure, I look forward to spending a few hours playing around with CC3. Lately it’s been the latter, and I’ve found quite a few gems mining my mini-library of TSR adventures.
This particular map is a reproduction of a “Buried Temple” encounter in the “Master of the Desert Nomads” module (X4). Our adventures leave the comforts of a desert oasis to investigate a recently unearthed buried temple – Once inside they’ll discover all manner of nefarious creatures, but should they survive, the rewards will be well worth the effort.
The most challenging aspect was trying to find a way to depict areas that are both above and below ground on the same map. I spent a great deal of time (and got lots of great suggestions from others on the Profantasy Forums) messing with my underground section. After creating my underground walls, I multipolied the area outside the walls and placed that shape on my Background sheet (which sat below my wall sheet on the list). From there I applied a subtle edge fade inner effect so that the sand was slightly covering the wall. I then multipolied the area inside my underground wall, applied my sand fill to that shape, and then added a transparency effect to that sheet. My hope was that these two techniques would give the view the impression that this area was underground.
After that, it was just a matter of dressing my dungeon utilizing various symbols from the CSUAC and textures from CGTextures.com. I also created a bunch of sand dune sheets (edge fade inner and glow effects) to muddy up the background. I’d be lying if I said that I was completely satisfied with the final product, but I think its human nature to demand more of yourself. I made a lot of mistakes with this map, but I learned even more. ..And I can’t wait for my next opportunity to start the cycle all over again.
If you’re not tired of my Desert Maps, you can see more in full resolution on my blog: http://drunkennerdery.wordpress.com/
[This map was created by forum user anomiecoalition.]
After a rather lengthy hiatus from the world of fantasy and roleplaying, I recently convinced a few friends to give it a try and set about constructing a world that would keep their interest. Along the way, I stumbled upon Campaign Cartographer 3 and was amazed at the maps that people were producing with it and the possibility that it provides to even the artistically challenged (like myself). After a short couple of week tinkering with the program and learning a great deal from the tutorials available I constructed Brightstone Keep.

The map and its back story are loosely based on a free adventure provided by Wizards of the Coast. The keep protects a mining operation that has been overrun by a variety of nefarious creatures. The symbols utilized can be obtained from the CSUAC.
The first step in creating this map was to establish the basic layout. I depicted a mountain wall running from the top left to bottom right corner for which I used three separate sheets and shapes. Then I added cliff running left to right towards the bottom of the map on another sheet.
I began by drawing a rough outline of the mountain wall and filled it with a dirt texture. I learned that it is a good idea to draw beyond the map border on these shapes to ensure that if I applied any edge-fade effects, they wouldn’t appear on the border side of the map. Using effects I then applied a slight blur and two black outer glow effects – one with strength of 0 above another with strength of 1. I then created two more shapes and sheets to go above this mountain wall and utilized different dirt textures. To these sheets, I applied a slight blur and an edge-fade-inner effect.
Depicting the cliff was a bit simpler – here I just reused the dirt texture from the background but constructed a separate shape on a separate sheet and applied a similar setting as that use on the first mountain wall sheet (but with an inner glow). The final step was to add some hill overlay transparencies to add some character to the terrain. I applied these symbols on a separate sheet and varied the size/orientation to achieve the desired effect.
In constructing the walls of the keep, I created four sets of sheets and shapes. I began by drawing some solid gray lines (width of 6 – adjust to scale) to create the outer wall. I then applied a texture sheet effect (stone texture of your choosing, Intensity 1, size 15); on top of that a black outer glow (strength 1, blur 2); a wall shadow (length 15, opacity 65, blur 5); and finally a bevel (length 1.5, strength 35, and fade 1). I next wanted to create a walkway for that wall. I copied the image to a new sheet and reduced the width to 3. I then applied a texture sheet effect (with a different stone texture but same settings) and an inner black glow (strength 1, blur 2). I followed the same procedure to construct the towers/ramp and placed those shapes and sheets on top of the wall. (The ramp actually required that I draw in a black shadow on the right side to give it some dimensionality.)
The last step was to draw in some roads and tracks. I laid down a road (added a texture, blur, and edge-fade-inner sheet effect) and then drew in the tracks according to the instructions provided in the Jon Roberts Special Issue of the Annual. From there it was just a matter of placing some vegetation, rocks, buildings, and text to complete my map.
I had a great time making this map and was amazed at how easy it was once I familiarized myself with the program (the video tutorials and assorted blog entries are invaluable.) I just hope my friends enjoy playing with this map as much as I enjoyed making it.
*I plan on posting more of my maps on my new blog