ralf | December 12, 2023 | free art, Mike Schley, monthly content, symbols

Perhaps it’s not a siege that is damaging your city, but a disaster like a great fire? And you want to show the conflagration as it is happening? Then these latest free fire and smoke symbols will come in handy!
20 new symbols depict flames and smoke as they rise towards and darken the skies above. Done for the Isometric Cities style, they can just as well be used on an overland map in the Mike Schley style.
The example maps included with this free content make use of Symbol Set 6 to showcase the symbols in proper surroundings. If you don’t have SS6 installed, you won’t see these, but you can still use the symbols on other maps. Symbol Set 6 – Isometric Cities is available for purchase here.
To download the free content go to your registration page and on the Downloads tab, click the download button for Campaign Cartographer 3 Plus. Mike’s new symbols are the last link in the list. All the content of year two up to and including July 2023 is included in the one download.
You can always check the available monthly content on our dedicated page.
Comments Off on Free Monthly – Fire and Smoke
ralf | November 16, 2023 | Mike Schley, monthly content, symbol set 6, symbols

Once those walls are broken, the city has been plundered and the attackers have moved on, what do you get? Ruins of course. Monsters will settle there, amass their own hoards and then adventurers come by to steal that loot. 16 new symbols depict ruined towers that create more variation for the city or castle ruins in the Isometric Cities style.
The example maps included with this free content make use of Symbol Set 6 to showcase the symbols in proper surroundings. If you don’t have SS6 installed, you won’t see these, but you can still use the symbols on other maps. Symbol Set 6 – Isometric Cities is available for purchase here.
To download the free content go to your registration page and on the Downloads tab, click the download button for Campaign Cartographer 3 Plus. Mike’s new symbols are the last link in the list. All the content of year two up to and including July 2023 is included in the one download.
You can always check the available monthly content on our dedicated page.
Comments Off on Free Monthly – Ruined Towers
ralf | September 27, 2023 | free art, Mike Schley, monthly content, SS6, symbols

Do you need to breach those impressive city walls that the Isometric Cities style provides. Here are a couple handy siege engines to aid you in that task. Position catapults and trebuchets can be positioned in four different views to throw rocks at those pesky defenders.
The example maps included with this free content make use of Symbol Set 6 to showcase the symbols in proper surroundings. If you don’t have SS6 installed, you won’t see these, but you can still use the symbols on other maps. Symbol Set 6 – Isometric Cities is available for purchase here.
To download the free content go to your registration page and on the Downloads tab, click the download button for Campaign Cartographer 3 Plus. Mike’s new symbols are the last link in the list. All the content of year two up to and including July 2023 is included in the one download.
You can always check the available monthly content on our dedicated page.
Comments Off on Free Monthly – Siege Engines
Remy Monsen | July 25, 2023 | CC3 Plus, overland, symbols
 One of the things that are easily overlooked when mapping local scale overland maps for gaming is the sheer numbers of settlements that traditionally dot the countryside. In medieval times, the distances between them could be surprisingly short compared to our modern standards, simply because we are used to larger settlements (and faster transportation) these days.
Now, dotting a landscape with settlements is pretty easy with CC3+, as we have great tools for doing this. To ensure randomness, we can have symbols randomly picked for each placement, we can use Symbols Along to place them along a road, and we can use Symbols in Area to fill a large plain with settlements. Great, job done.
Well, if you try to do this with a standard overland map, you’ll quickly notice that this doesn’t seem to work as desired for this purpose. You’ll notice that the groups in the settlement symbol catalog are set up with groups containing just a single symbol, including varicolor versions of that symbol. Now, that is not going to help us spread settlement symbols of various sizes easily as we wanted.
What we are seeing here is really the fact that you can’t organize everything for every imaginable purpose. It is similar to sorting your contact list on your phone. Should it be sorted by last names or first names? Last names are probably more formally correct, and it ensures that all the people from the same family appear next to each other, but you’re probably more used to refer to people by their first name, making them easier find for you when sorted that way. Neither way is wrong, but you can only have one of them at a time. Symbol catalogs are similar. When making them, the creator need to figure one sensible way to offer them, and then leave it to the users to rearrange things when needed. And that is what I will be showing today. I am using Mike Schley Overland for the example here, but this can of course be done with any map type and any style.
Continue reading »
Comments Off on Random Settlements – Modifying Symbol Properties to Suit the Occasion
ralf | March 16, 2023 | Isometric Cities, mike, Monthl, symbol set 6, symbols
 For March’s free symbols Mike Schley has drawn two new, beautiful buildings for his Isometric Cities style (of Symbol Set 6). A fantasy city worthy of its name does need a Wizard’s Tower of course, and the style was lacking in this regard. The second symbol is a big corn exchange, that can also be used as a guild house or similar building for the mercantile quarter of the city. Both are shown in four different views.
Note that the example maps included with this free content make use of Symbol Set 6 to showcase the symbols in proper surroundings. If you don’t have SS6 installed, you won’t see these correctly, but you can still use the symbols on other maps. Symbol Set 6 – Isometric Cities is available for purchase here.
To download the free content go to your registration page and on the Downloads tab, click the download button for Campaign Cartographer 3 Plus. Mike’s new symbols are the last link in the list. All the content of year two up to and including February 2023 is included in the one download.
You can always check the available monthly content on our dedicated page.
1 Comment
Remy Monsen | February 28, 2023 | CC3 Plus, symbol catalog, Symbol Catalog Buttons, Symbol Catalog Settings, symbols
 When you make your own symbol catalogs, either from new symbols, or just to create a re-mix of existing symbols, one of the main issues is how to make them easily accessible. Sure, you can always click the open symbol catalog button and browse for it, but that means you need to remember where it is, and it is more complicated than just clicking one of the symbol catalog buttons in the top toolbar.
But, if all the official catalogs can be loaded from those buttons, why not our own? It’s actually quite simple, so let us have a look.

Continue reading »
Comments Off on Mastering Symbol Catalog Settings
ralf | February 9, 2023 | city mapping, Mike Schley, monthly content, symbols
 For this month we have a few very useful symbols for the Symbol Set 6: Isometric Cities (but which could also be used on overland maps). These Isometric Bridges can be extended to variable length to span any width of river, gorge or similar terrain feature.
Note that the example maps included with this free content make use of Symbol Set 6 to showcase the symbols in proper surroundings. If you don’t have SS6 installed, you won’t see these correctly, but you can still use the symbols on other maps. Symbol Set 6 – Isometric Cities is available for purchase here.
To download the free content go to your registration page and on the Downloads tab, click the download button for Campaign Cartographer 3 Plus. Mike’s new symbols are the last link in the list. All the content of year two up to and including February 2023 is included in the one download.
You can always check the available monthly content on our dedicated page.
Comments Off on Free Monthly: Variable Bridges
ralf | October 17, 2022 | community, decoration, symbols, user tutorials
EucalyptusNow over on the Profantasy community forum posted an excellent little tutorial on creating decorative symbols by tracing graphics from other sources, and we thought it would be great to share this on the blog. So break out your mapping tools and follow along.
This is a tutorial for creating vignettes / decoration symbols out of rounded polygons by tracing existing images.
I’ve more or less stumbled upon this method, after I wanted a spider to decorate a map and could not find one exactly like I wanted, so I drew/ traced it.
Step One: Determine what you want for your map.
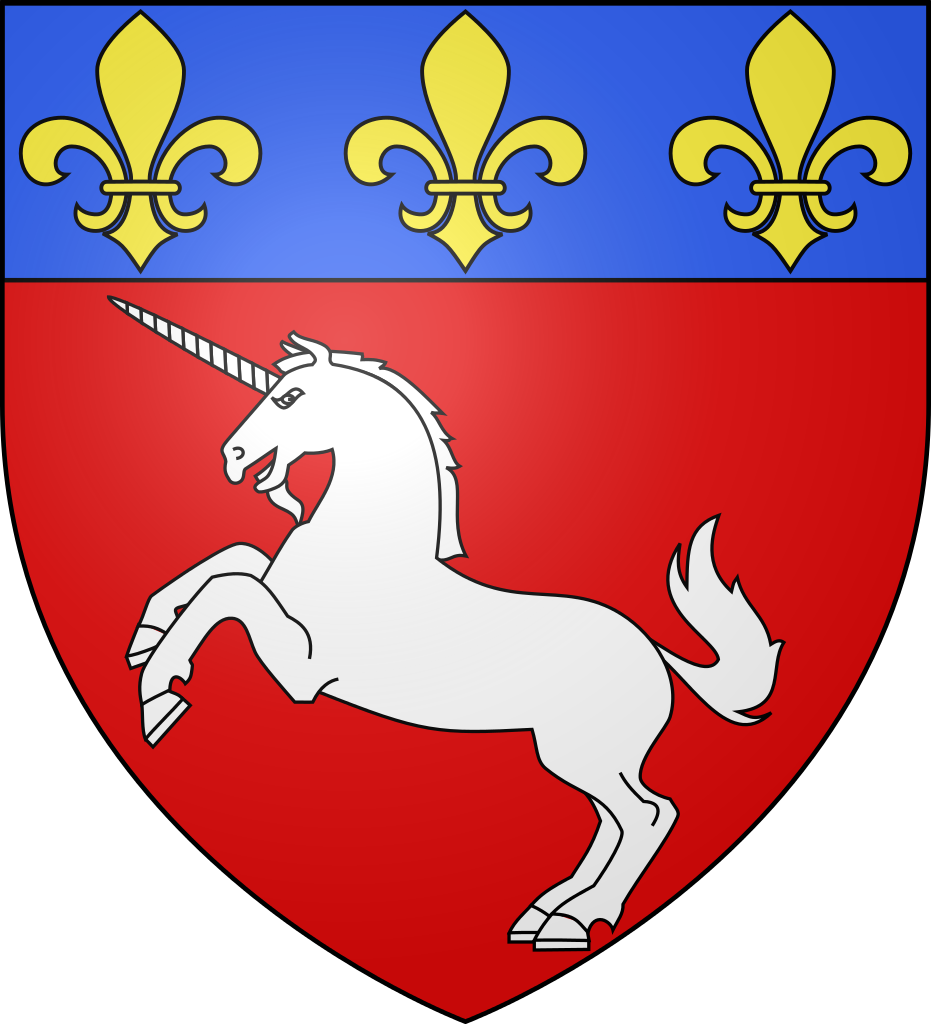
Based on the opinion of a certain younger member of our household, I’m going to use a unicorn as an example. It should be suitable as a crest, stamp or as a general map decoration.
Step Two: Find a suitable source image:
This image could be any drawing, picture or even photo. The most important thing is that the general shape of what you want to trace matches what you want.
Please keep copyright in mind if you are planning to use the created symbol for a map you are going to publish. I try to use public domain images whenever possible.
After some searching around, I’ve found this public domain crest on Wikipedia:
https://en.wikipedia.org/wiki/File:Blason_ville_fr_SaintLo_(Manche).svg
Continue reading »
Comments Off on User Tutorial: How to Create Decorative Symbols by Tracing
Remy Monsen | May 26, 2022 | cc3plus, symbols
 If you own a lot of ProFantasy products, or have installed one or more of the large community symbol packs, you will have a lot of symbols. By default, CC3+ will give you easy access to the symbols belonging to the current map style through the symbol catalog buttons immediately above the map window, but sometimes you may wish to search for other symbols not made for the current style, which may fit anyway. But how to best find these symbols? Let us check out a few ways which may be of assistance to you here.
Continue reading »
Comments Off on Finding your Symbols
ralf | June 10, 2021 | Mike Schley, monthly content, overland, symbols
 Good news, dear map-makers! We are happy to announce that starting in June 2021 (i.e. Now!) we are releasing regular free content for Campaign Cartographer 3+.
This is available as a separate download from your registration page (among the CC3+ downloads) and will be rolled into the full CC3+ setup and upgdates regularly.
We start out with a batch of symbols for elven places by Mike Schley, expanding his overland style. Show your ancient elven civilizations with cities, towns, villages, holy groves and castles in their deserved splendor! Download it now from your registration page now, the new symbols will be integrated into the Strcuture catalog of the Mike Schley Overland style.
6 Comments


