Location, Location, Location
by Steve Davies
Cities are one of the greatest environments for RPG adventuring. In a tight space, players can reasonably encounter every type of roleplaying challenge and meet each with a dizzying array of strategies and tactics. Cities can also be a gamemaster’s (GM) nightmare. It’s difficult to know where players will go next, detailed preparation is almost impossible, and everything should be available. To be successful, GMs need overall planning and a good city map. This series will get you started on the map and support your planning.
This is the first of a short series of articles on mapping cities for fantasy roleplaying games. I’ll show you the main considerations as you place, design, detail, and then play in the city. When we’re done, you’ll be able to draw out a reasonable city with confidence and present your players with an experience they won’t forget. I use ProFantasy’s Campaign Cartographer as my main mapping tool, and all of the maps are drawn with it. There is no post-processing on any of the maps.
I recommend that as you build your own city, that you keep a notepad at your elbow to record your thoughts and designs. Mapping is a creative process, and you will find that you generate many ideas for future adventures as you create your maps. Write the ideas down, and transfer as many of them to the map itself as you can. That way you can find them when you need them. So if you’ve just mapped a narrow pass that would be perfect for an ambush, add that encounter idea as a “GM-only” hidden note. If you don’t write them down in the moment, it’s often tough to remember or recreate the ideas later. And it’s great to be preparing for a gaming session and pull up the notes as a way through creative blocks. You will find that in city building, these notes are critical to make the city come alive later.
About Cities
Cities in the middle ages were rare. Fewer than a dozen true metropolises existed before the modern era. That is because a city needs the following things to grow and flourish:
- Abundant food and water to feed the population
- Water access: Either a navigable river or seaport
- Defense: Hills, river bends, and offshore islands all protect the riches of the city.
- Trade routes: Trade is the lifeblood of the city and where routes meet or goods transfer, cities grow.
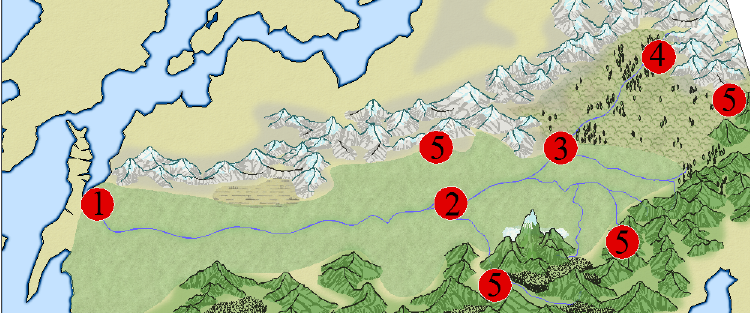
The first task for anyone mapping a city is to find a suitable site for the city. On the map below, I’ve mapped the most likely places for a city to grow:
- Mouth of a Major River: This is an ideal spot, and where we will put the largest city in the kingdom
- Trade Route Crossing: There are major resources up both tributary rivers, as well as a quick route to the passes in the north. Plus, the southern river provides clean water.
- Lowest Bridging Point: This is the point closest to the ocean that a bridge can be built over the river
- Highest Navigation Point: The point beyond which ships cannot travel.
- Passes: Travelers often have to wait, and it’s natural for a city to form here.
I’ve chosen point 2 for Templeton, the second largest city in the kingdom. It’s in the middle of farming country, has good water, access to trade, and a center of magical power.
Before leaving this map, I’m going to place a symbol for Templeton and put a little color around it to signify the farmlands around the city that directly serve it. I often place a hyperlink in the map when I place the city symbol. That allows me to go immediately from an area map to the specific map.
Now we’ll turn to working on the city itself.
Drawing the Locale 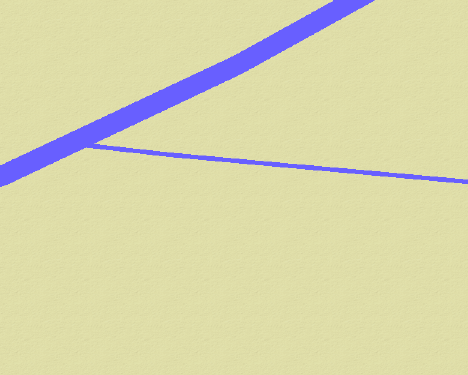
My country map, when magnified, looks like this to the right. There’s not much detail! We are so close to the area that the two rivers just look like lines. And I haven’t put in much detail on the main map, so there is no other detail to show here. So we’re going to work to detail it and we just need to make sure we respect the river routes.
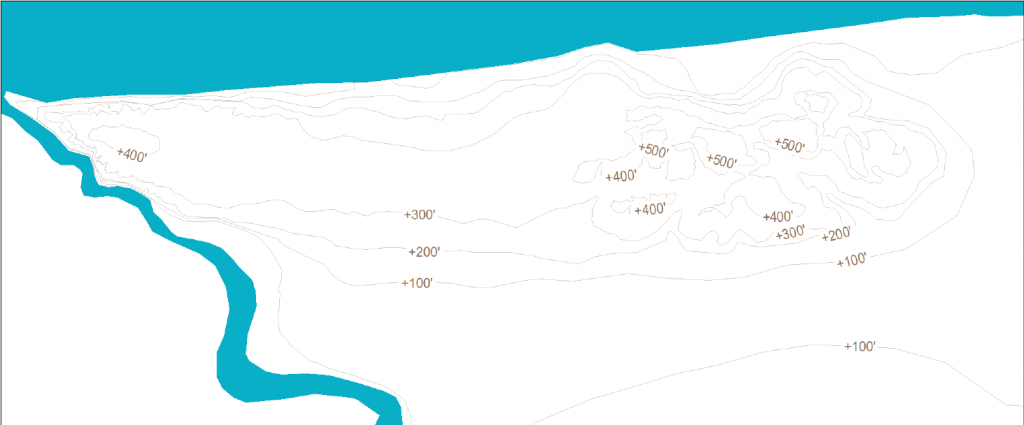
The first task is to map the land on which the city sits. If you want to make this easy on yourself, put the city on a flat piece of land. My city grew on a small hill that rose above high flood marks on the river. Over thousands of years of building and razing, the hill has grown to about 500 feet in height. I like putting in the actual contours, as you can see on the map below, but you can just as easily just have the city sit on flat ground or denote where hills are.
Next, I’ll take the general lines of the rivers and draw rivers that look more like real rivers up close, and I get the following map:
Now we’re making good progress. You can see that I added a lot more detail to the rivers, widened the top one, and added bends to the lower river as it crossed the plain. I realized that the river at the top of the map should be wide enough that the far side no longer fits on the map. That’s one advantage of making separate small and large-scale maps–you can add the detail that is appropriate. I turned everything a little bit counter-clockwise as well to orient the city more squarely to my map.
Now before I go much further, I need to make sure that the scale that I’m working on is about right. To do that, I need to know how much room the city will take up.
My rule of thumb is to have the cities be about 2% to 5% of the population of the land. There are many good sourcebooks to determine population, but I’m going to use a feature of CC3, its ability to calculate an area, to determine the amount of farmland I have. Using the Area command on the grassland of the regional map, I find that I have about 100,000 square miles of cultivated land. If I use a figure of about 50 people per square mile, I get a total population of about 5 million souls for the kingdom. Using a 2% city-dwellers figure, that gives me a total city population of about 100,000. I want three cities, so I’ll put about 50,000 in the capital city on the coast, and split the rest between the two other cities.
Since this is the second city, I’ll make it about 30,000 people, a large city by medieval standards, and one where the population swells dramatically during festival weeks and important ceremonies. So I’m going to pack the city densely, assuming that the permanent inhabitants will put in guest rooms and other buildings to take advantage of the wealth that visitors bring.
For the city itself, I usually use between about 80 and 150 city dwellers per acre, and 2-4 people per building. Since this city gets an inswell of people during ceremonial days, I’m going to select 100 people per acre for the permanent population and put in as many buildings as possible. So on ceremonial days, the city will have 200 people per acre, and be overcrowded. The 30,000 people in this city need about 300 acres on which to live, which is a little less than ½ square mile. And I’m going to pack more buildings in so it’s completely filled with buildings to house the periodic influx of visitors.
Outlining the City
Having the size and area of the city determined, I then draw a rough outline of the city. Cities on ridges, like this one, tend to be linear, with anchor attractions at either end of the main road. Cities on plains will expand along trade routes. We’ll talk more about this as we detail the districts of the city. For now, I’ll draw a lozenge shape on the city hill and check that it’s about the right size:
The area that I’ve shown is about ½ square mile, so it’s a good approximation for what I need. Truth be told, when I first drew this area, it was about ½ the size I needed, but I liked the shape and where it was. So I just scaled everything in the map by about 2x, and checked that the rivers mostly lined up (they did), and I had a map the size that I needed. We’re gamers, so it’s important to have ways to get the results we need quickly from our tools.
Details
Before leaving this phase of city design, we need to identify routes into the city, and any important details needed outside the city. I also like to put in the city walls at this point. By doing walls now, I often face the same constraints that city leaders probably face: They put in the walls to contain expected growth and needs, but sometimes things don’t develop as planned. When I find later that a wall is not where it would be most convenient, I can easily move it in the mapping tool. At first, I try not to move the wall. I try to find a different way to do what I need. I find it often leads me to put in interesting features, such as the cattle market that only made sense if it were partly inside and outside a key city gatehouse. That meant that while the market was going on, there was no way to close the gate, which gave characters some interesting tactical options. Or the manor house that did not have enough room to expand, so they built up, and ultimate onto, the city wall, causing no end of problems and disputes.
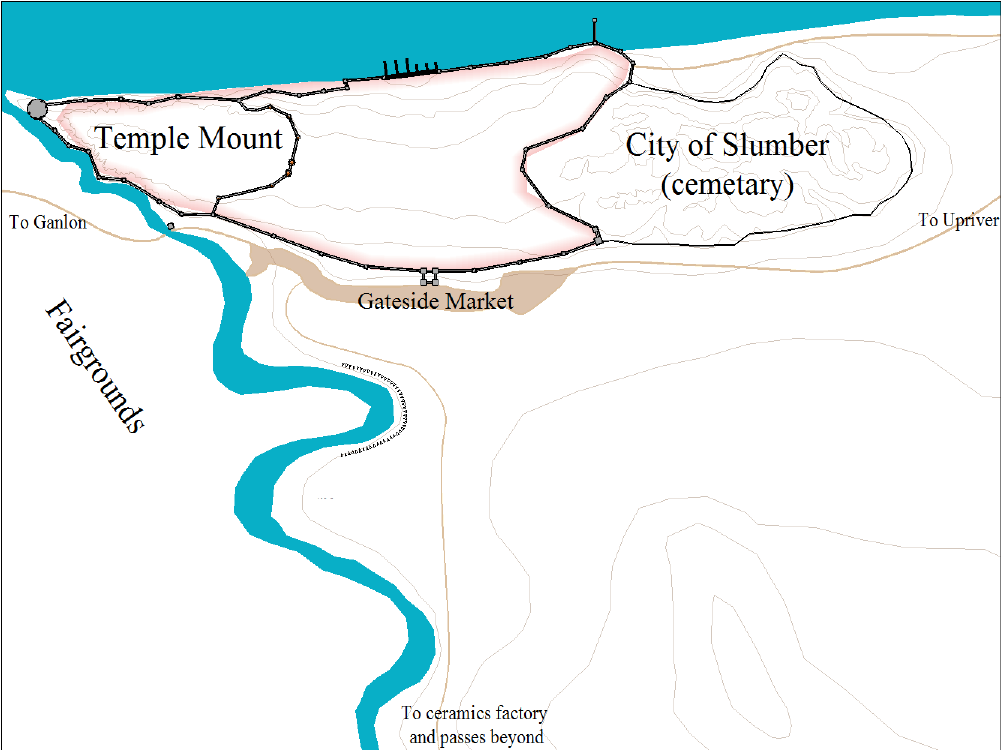
The huge river north of the city periodically floods, so we’re going to put the main gate to the city at one of the higher points in the wall, to keep it out of floodwaters as much as possible. That also keeps it away from the steeper patches at either end of the hills.
Once I’ve added in the walls, a few external features, and made a few text notes, the map looks like this:
Overall Feel
Before leaving the initial stages of city building, I like to step back a minute and look at the big picture. If done right, this city will be a focal point for the campaign and many sessions. It is worth thinking about the overall feel of the city, and about what will make it special. Find some things that bring the city alive. I’ve made cities full of flowing water and fountains. The main city in this kingdom sits just above a huge waterfall. Ptolus, Monte Cook’s beautiful city, has a waterfall and cliff in the middle.
For Templeton, the mythos of the world requires a set of strong temples on the high western hill. In addition, I want to have a ‘city of the dead’ on the hills at the east of the town. If the area around the city often floods, burying the dead above floodwaters might make sense. Beyond these obvious things, I want the city to be very dense, with crooked streets and houses that encroach. I envision a ruling body of priests who are more interested in otherworldly things than they are in keeping roads clear. There should be lots of hawkers of religious trinkets and other wonders of the world. So overall, this may look more like a romanticized eastern city than a quaint English town.
For now, that’s enough to go by. Stay tuned for part II in which we will plan the districts of the city, place key points of interest and begin laying out roads and major buildings, taking into account the needs of glorious game play.
The City Mapping Series
Part 1: Location, Location, Location
Part 2: Urban Planning
Part 3: Laying out Districts
Part 4: Districts in CC3
Part 5: Sizing Buildings
Part 6: Filling Blocks in CC3
Part 7: Houses Galore!
Part 8: Outside the Gates
Just printed that…
Great article, many thanks!
I just have two questions if I may:
i) I may reveal my lack of knowledge but why is site #3 the point closest to the ocean that a bridge can be built over the river? Why not at #2? Is the river there too wide? If so, how do you estimate the width of a river? (that’s four questions, I know…)
ii) could you please provide a printer friendly version, perhaps once all the parts have been posted?
Looking eagerly forward to reading next part,
JdR
Well, looks like I may not ask questions 🙂
Sorry – the author isn’t monitoring this to check for questions. We’ll ask him.
Sorry for the delayed response — I didn’t see the comment.
Using point 2 versus point 3 as the lowest bridging point, yes the explanation is the river’s too wide at point 2, plus given the spring flooding, the technology of the kingdom can’t span it. You could go through a lot of calculations, gauging rainfall and whatnot, but frankly I just winged it. What’s important is just to be aware that since rivers typically get wider as they flow, you aren’t going to get bridges lower down.
I’ll see what can be done about putting a printer-friendly version together. Thanks for the suggestion.
Steve
Spiffing stuff, Steve, especially about noting down your ideas as you think of them. It’s also very handy to see the population figures, it’s always difficult digging them out of reference sources.
Traveller, I’m glad you like it. I started working on this article a long time ago when I was searching (for the umpteenth time) for the population data. I decided that I’d just start writing it all down.
In truth, population densities vary a lot, so I always use them as a ‘rule of thumb’ and then think up a reason why they are higher or lower than ‘normal.’ That often leads to interesting city developments as well as prepares me for player questions.
Steve
Thanks for your answer, Steve 🙂
This lowest bridging thing makes a lot of sense but I never thought of it. Enlightening !
Once you see it the lowest bridge idea, it makes complete sense: The river is a real block when you’re down near the coast. Sure you can load stuff on boats and ferry across, but that’s time and labor consuming. But your only other recourse is to travel upriver until you find a place that is narrow enough for someone to build a bridge, which then has a lot of traffic, generates tolls, commerce, and ultimately a city.
Steve
[…] […]
Up until now I only had vague ideas of how to make a city and in my own game world I have many cities and towns. Already this gives me a much better idea of what to do. Thank You!
Thanks Eleomer. We’re going to keep going with these, alternating theory and how-to in CC3. Let us know if there is something specific you want to see!
Steve
[…] […]