Terraformer is a free add-on for Fractal Terrains 3 by Bill Roach. In this article, Michael G describes how he used Terraformer to create a good looking world in a matter of minutes.
Steps to creating a world in Fractal Terrains
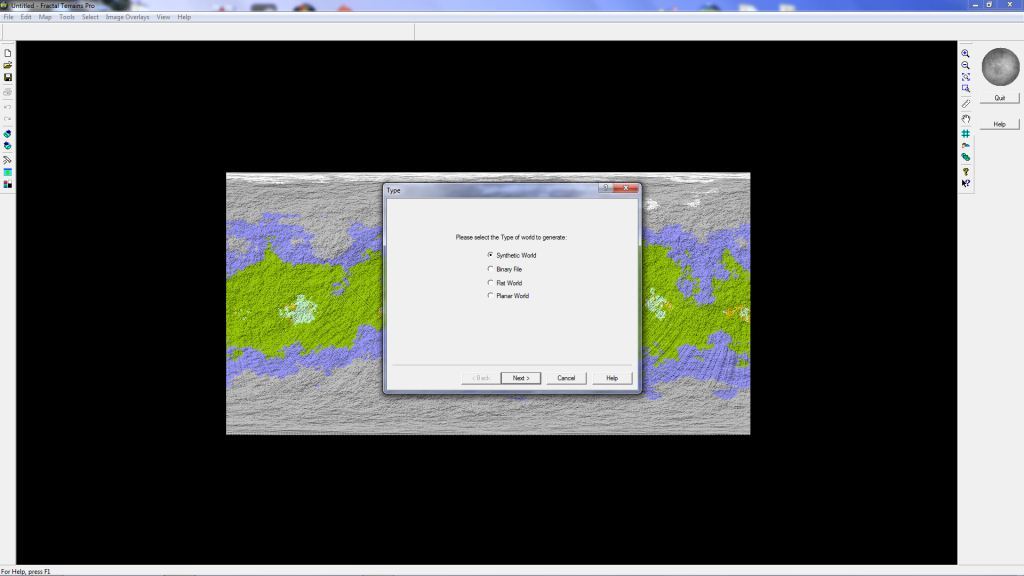
Step 1 – I normally start with the “synthetic world” planet type. I really don’t care much for the other world types, so I tend not to use them.
Step 2- In this example, I am using the standard defaults. For most of my maps, I tend to make the peaks higher and the valleys a little shallower to accentuate the peaks. Using the Brownian Noise or Ridged Multifractal methods generally generate the best maps when doing rock type worlds, at least in my opinion. I generally stick to Ridged Multifractal, but that is a personal preference. To flatten out the landscape, I lower the peaks and create shallower valleys.
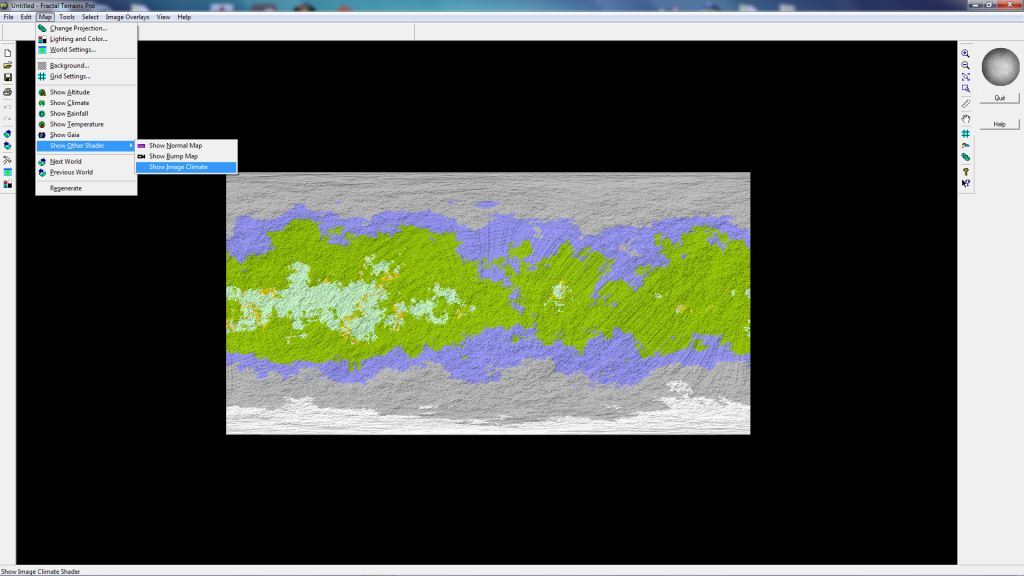
Step 3 – Once the world has been generated, I select the “Map” menu, go to the “Show Other Shader” submenu, and then select “Show Image Climate”. In this particular instance, I’m looking to create an airless world so the selection of the surface is critical to conveying that theme.
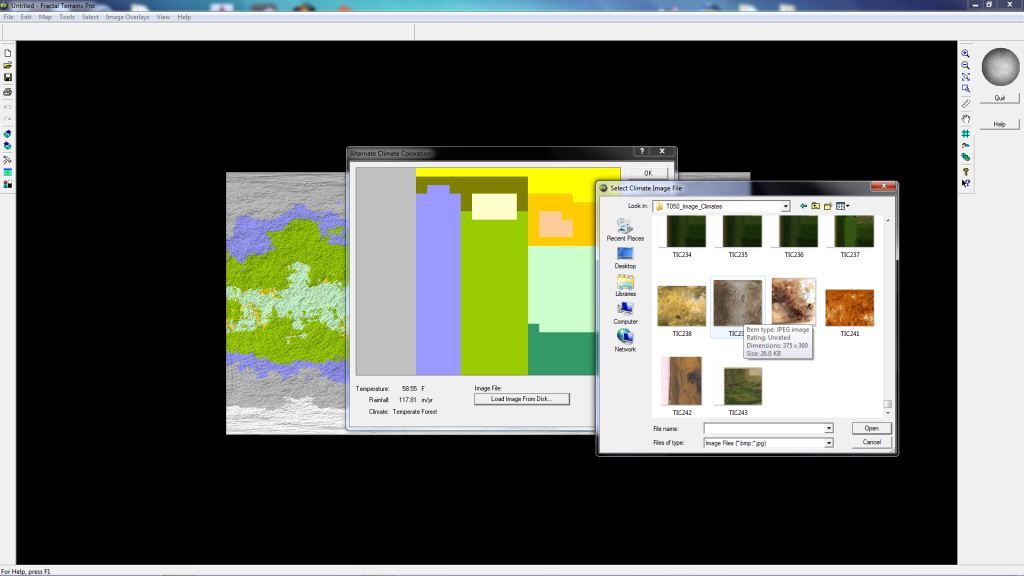
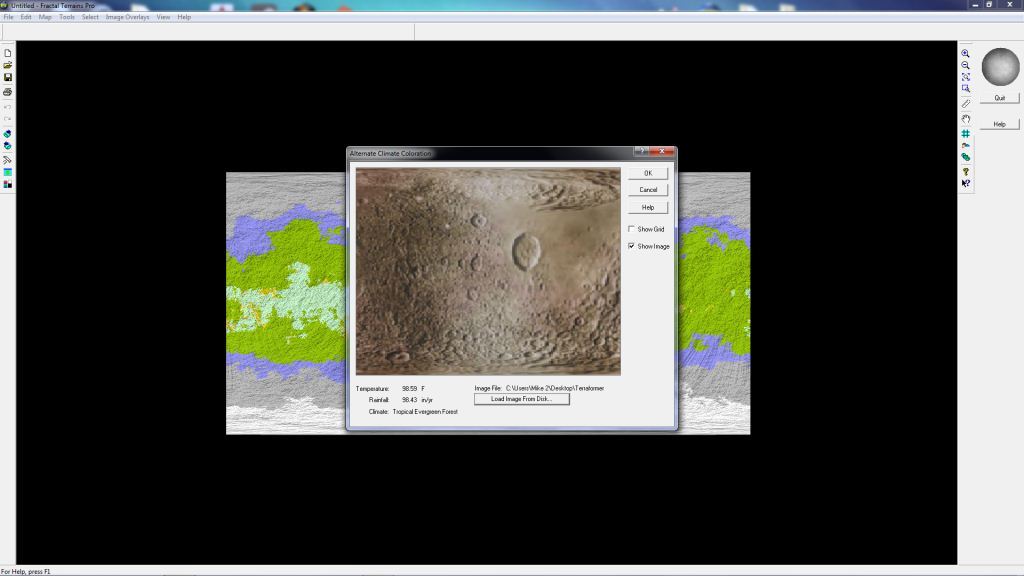
Step 4 – Once the “Show Image Climate” menu item is selected, it brings up the default color scheme, which is seen in the background. I select the “Load Image from Disk” option at the bottom, as I don’t want the generic color model that is being used. In the Terraformer directory, I select the “T050_Image_Climates” folder and open that up. Again, I’m looking to convey a barren, airless, rocky planetary surface. 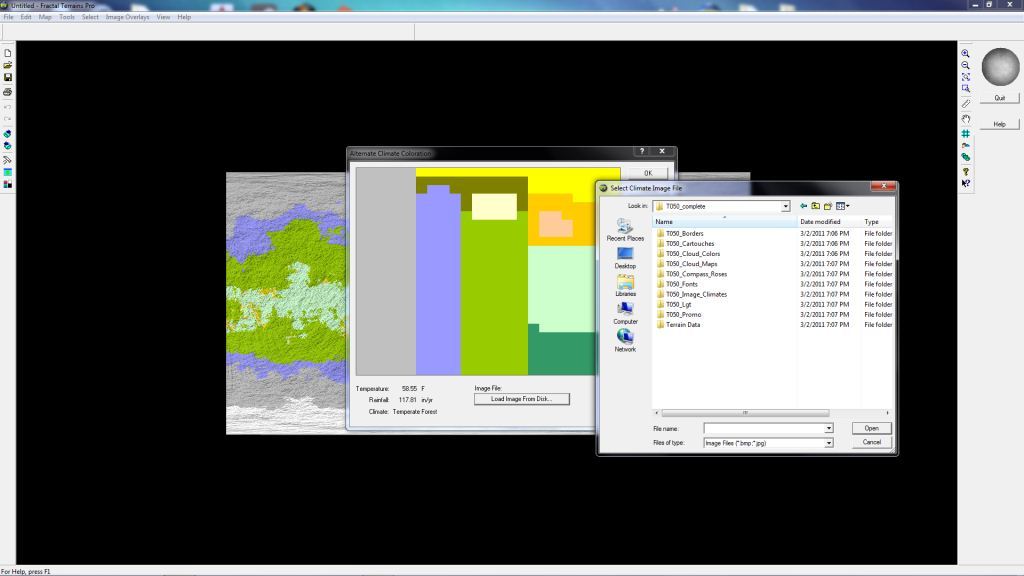
Step 5 – Since I’m looking for barren and airless, I selected the image “TC239” from the list and load that as the landscape.
Step 6 – Once it is selected, you will see how the surface will look in the preview window. This is what I am looking for, so I simply hit “OK” at the top right.
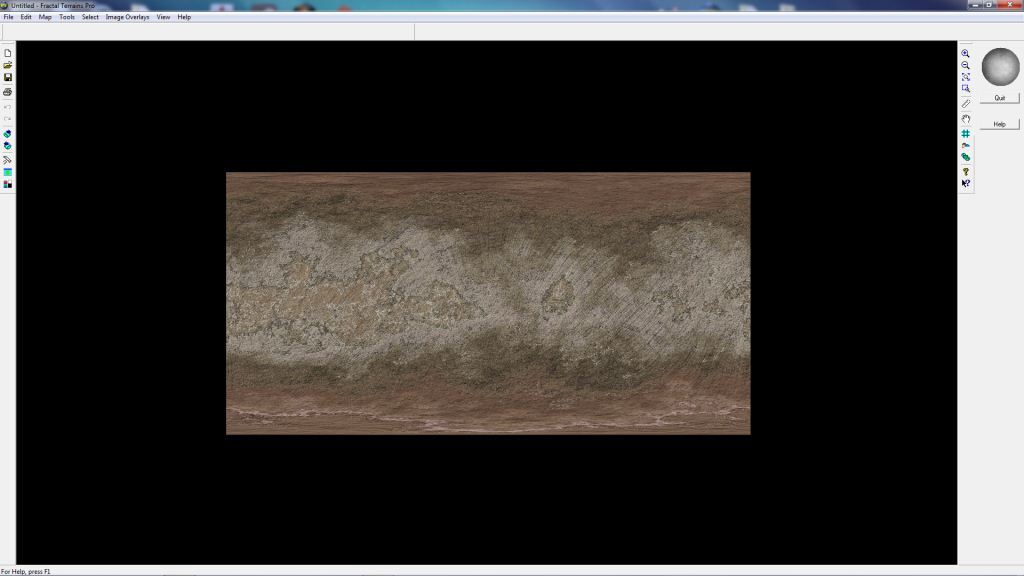
Step 7 – Once the redraw is complete, I can now see how the colors have been applied to the surface. It looks pretty good right now, and I think I have captured the essence of what I was looking for in terms of the planetary background.
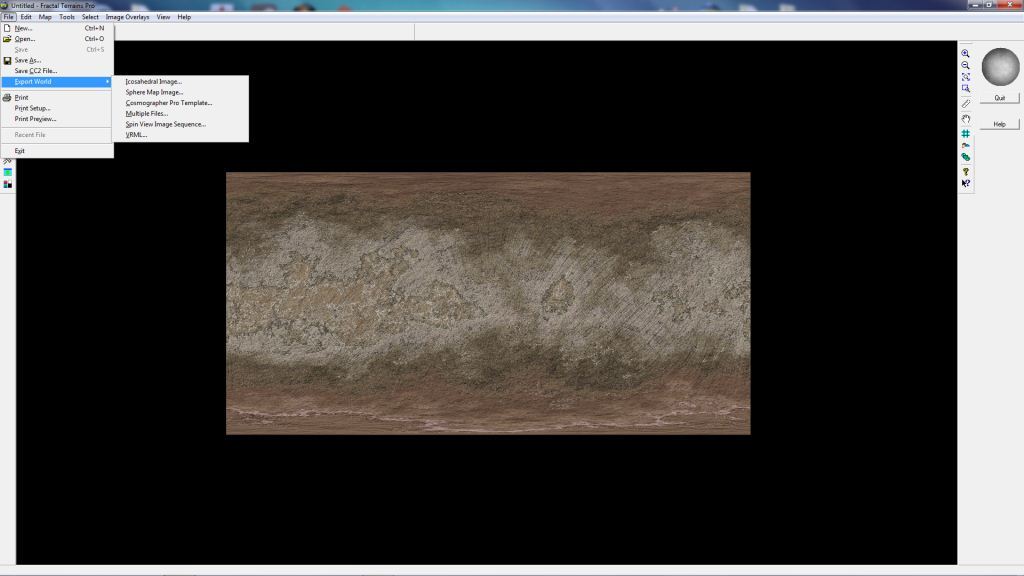
Step 8 – At this point, I go over to “File” and select “Export World” and then I select “Cosmographer Pro Template”, making sure I put the map in a location I can find it again. There is no “Cosmographer 3” option, but don’t worry about it, as the file type is the same.
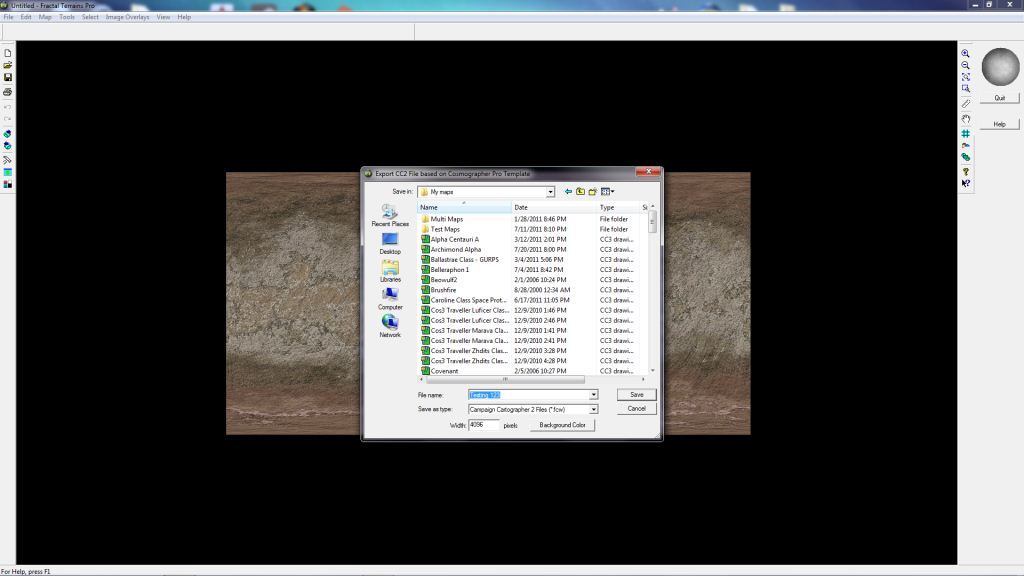
Step 9 – To easily find my maps again, I created a folder called “My Maps” which I placed right on the desktop. As you can see, I’ve tried lots of different iterations of my maps, and I’ve created quite a few other types of maps in Cosmographer 3 (CC3) as well. In this case I will just list this as “Testing 123”. You can see that it automatically fills out the type of format, in this case a *.fcw file. As a hard lesson learned, I found it is absolutely critical to make sure you increase the pixel count to something around 4096, as you can see in the bottom left of the pop up box. If you don’t select a higher pixel count, the final figure once you bring it into CC3 will not be a very good base figure, and will look pixelated.
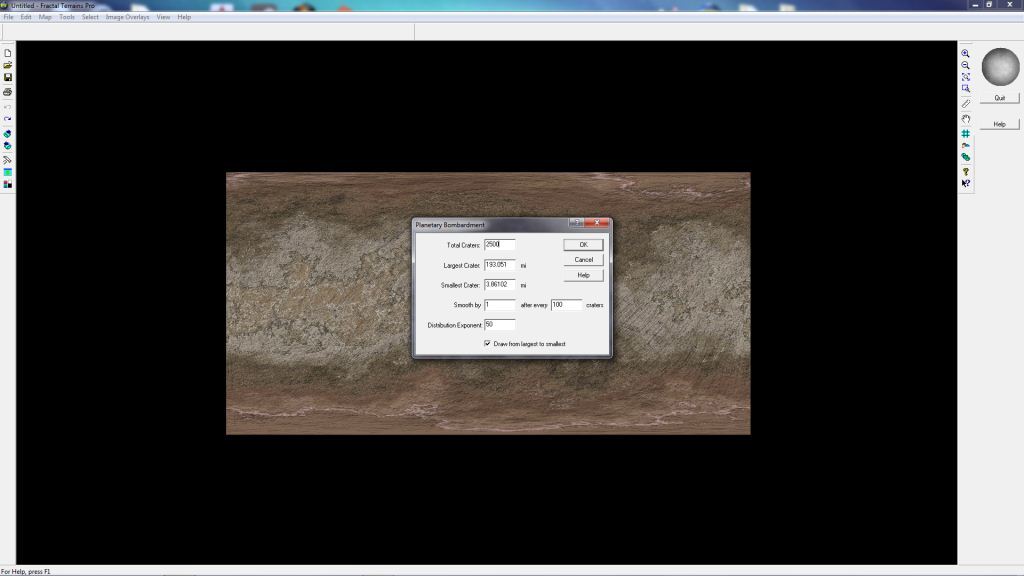
Step 9A – A neat little trick, if I want to add more character to my worlds, especially to moon surfaces or rocky outer planets, is to select the “Planetary Bombardment” option under the “Tools/ Actions” menu. I’ve done that here as an example. 
Step 9B – When selecting the “Planetary Bombardment” option, to really get an easily recognizable cratering pattern, I tend towards to the 2500 to 3000 “total craters” option. Choosing fewer craters tends to hide them, while adding more just completely overwhelms the surface features I have, which I don’t want either. I usually leave the defaults for the other settings, as I don’t think they add much to the final product. Once I’ve made my selections, I simply press “OK” and the program runs the simulation and applies the impact craters.
Step 9C – Once the bombardment has been added, the surface takes on a nice, randomly distributed pattern of impact craters. I actually could have lowered the amount of impacts slightly (maybe to around 1500 – 2000 or so) and I think I still would have been happy with the results. Any lower and they probably would not have shown up well.

Part 2 covers exporting into CC3.

Thanks for this post, since Fractal Terrains is a key tool for my project, FAR Colony, this tutorial is really useful !
Incredible feature, and now i know why i downloaded the 604mb of the Terraformer addon !
I also want to thanks Bill Roach for his fantastic addon, reading the manual right now, it’s time to work 🙂
Your very welcome farcodev. I love to make materials that help other folks to be creative – and I really get a kick out of seeing what people come up with when they use them.
I am very happy that you are having fun using the Terraformer materials.
[…] This is a follow-up to Creating a Fractal Terrains world with Terraformer Part 1. […]
[…] Creating a Fractal Terrains world with Terraformer – Part 1 […]
I know that’s an old post but I finally completed the first planetary system of my game.
You can see the dev post about it here:
http://farcolony.blogspot.ca/2013/09/alpha-7-061-fixes-completion-epsilon.html
And the HR maps here:
http://opengameart.org/content/far-colony-epsilon-eridani-planets-4k-surface-maps
Thanks again for Fractal Terrains and Terraformer! 😀
@farcodev, you’ve done a good job on that world.