SteveDavies | May 8, 2012 | CD3, city, city design, mapping cities, Tutorial
Up to now we’ve mostly been working inside the city walls, where space is short and buildings necessarily packed

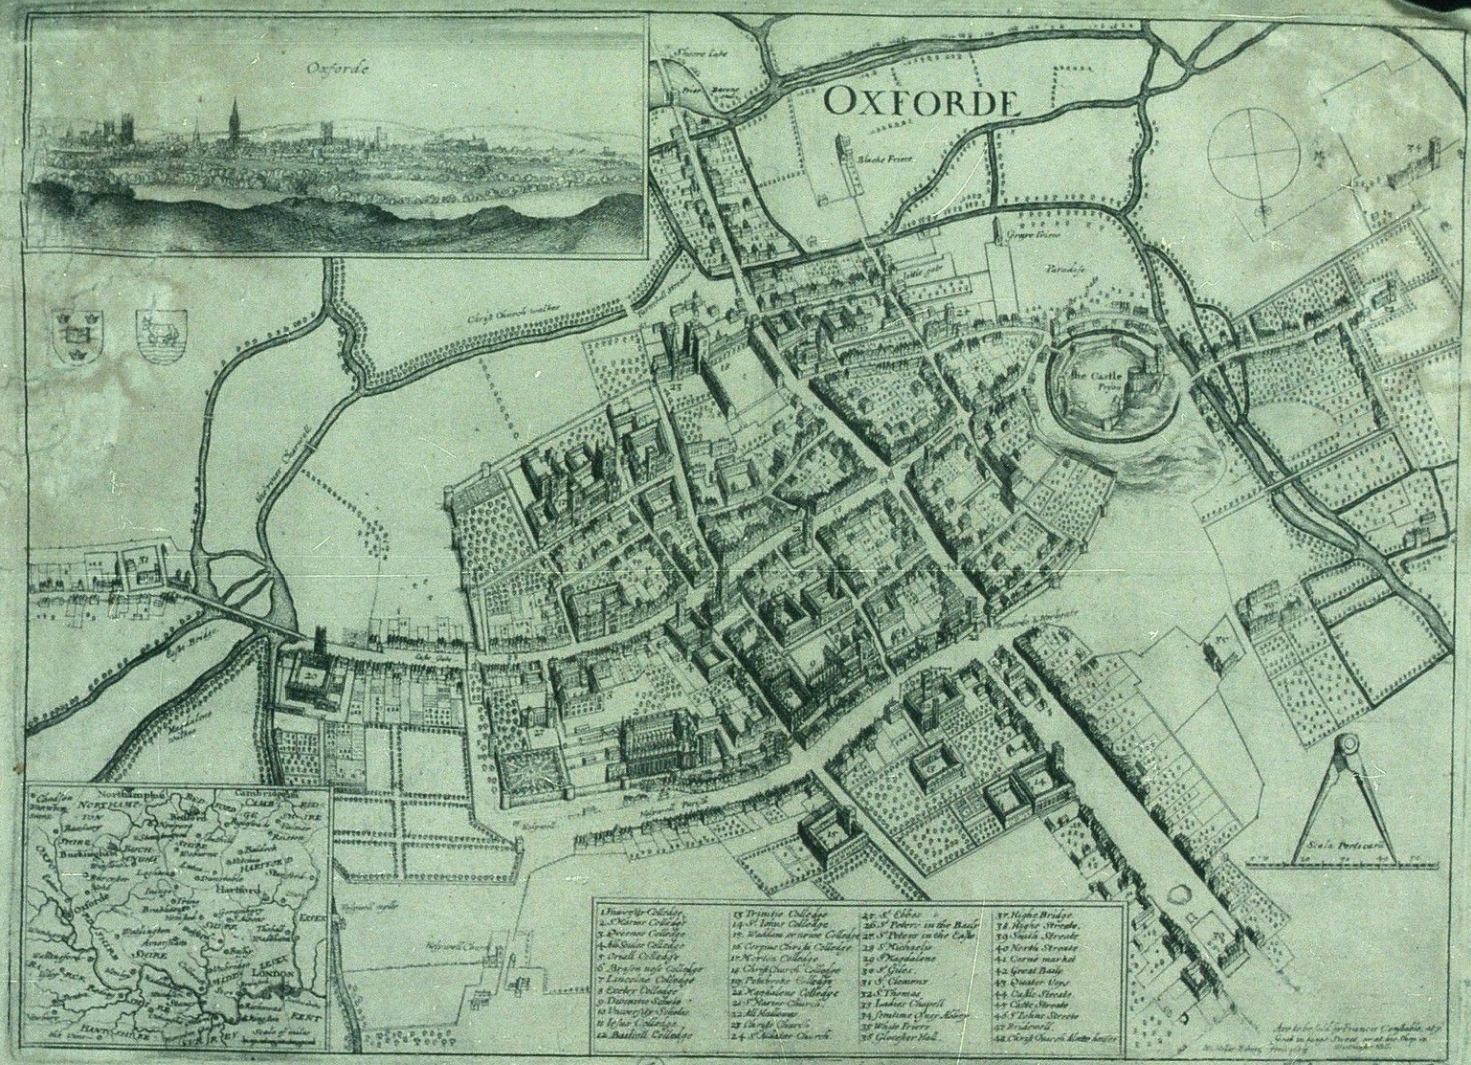
Historic map of Oxford in 1643
closely together. We’re now going to turn to the area outside the walls. In this installment, we’re going to turn back to some theory.
First we need to talk about why businesses decide to set up outside the walls of the city. After all, they are forgoing the protection that walls bring, so there must be some good reasons for it. It turns out the reasons are pretty simple:
- Avoiding authority: This is monetary, avoiding taxes, but also includes regulation, attention of the town watch, even to avoiding the prying eyes of neighbors. The city’s authority ends with the city walls, and some people find their business flourishes where there is less oversight.
- Accessing markets: Gates into the city are notorious choke points for people entering the city. The gates typically only open at certain times, guards ask questions, and just the physical size of the gate all conspire to leave large numbers of people waiting outside to get in. And where there are large numbers of people waiting or stranded, there is money to be made selling goods and services to them.
- Space: In many cities, space is at a premium. So businesses that require lots of space such as cattle markets, or that need space from neighbors, such as tanners, will often set up outside the city walls.

Historic map of Bristol in 1582
What this leads to is a mini city just outside the city walls, where crowds are most likely to form. This is where taverns and inns, and potentially more reputable shops can be found as well.
As you move away from the gate, more space opens up and larger markets and establishments have more room. Typically these spread out along the main roads leading away from the gate. Over time, some side roads may form if the population of the city continues to grow.
You might guess that citizens of the city are unlikely to approve of markets being established outside their walls. They will object to being undercut on price, object to the less savory businesses that occur outside the walls, and complain about customers journeying to their city experiencing the underside of the city before coming through the gates.
Over time, as the city outside the gates grows, the city will expand its limits to incorporate land outside the walls. Then the pressure will grow to expand the walls to encompass the new land. Once funds can be raised to build the wall, the city will expand and cannibalize the old walls.
1 Comment
SteveDavies | March 8, 2012 | city, city design, mapping cities, Tutorial

First buildings with effects on
Ok, we’re going to spend time today filling in a block section with houses. We’re going to be using the House command from CD3 extensively, so you should be an expert in it once we’re done.
The house command is in the
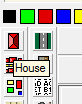
upper left corner of your toolbar and looks like a roof seen from the top – a screen shot is to the right (you can see the “House” tooltip as well):
We won’t spend a lot of time going through the different options, but I recommend that you review two sections of the online help (Help>Search):
- House Shapes: Good information about what each shaped house is, and the order CC3 expects corner points to be placed. Generally you will place two points that define the long axis of the roof, but the interpretation of the third point varies from shape to shape.
- Roof Types: Gables and styles of roofs.
Scrolls through the House settings part of the dialog to look at available styles. I recommend that once you have found a style you like, place one or two buildings and scroll out until the map is roughly the size that you will use. Some of the house styles have wonderful detail that looks great in-close, but which compresses to a black blob when you scroll out a long way.
I’m using the CD3 B Fantasy varicolor symbols. The roof lines look great at medium resolution, and I plan to not show the individual buildings when I am using a city-wide map. Varicolor means that the building will pick up the currently selected color – this gives you flexibility to change colors periodically to add some needed variation to the buildings.
Start with rectangular buildings – they are most common in real houses, and easiest to place.

City block almost completely filled in
I like moving along a major road, placing one building after another. Here are some tips:
- For a medieval city, don’t worry too much about getting each building front exactly lined up with the buildings next to it – there will be variations in real life. But do use the “Parallel To (F11)” and “Perpendicular to (F12)” snaps (Tools>Snaps) to ensure that buildings square to the road or to each other.
- The roof line will run parallel to the first side you draw – so for most buildings you will want to put your first point at the street and the second point well back from the street so that the line is perpendicular to the street (the F12 snap is made for this – put your first point, press F12 and select the edge of the street, now your next point is constrained so the wall must be perpendicular to that street).
- If you are using varicolor symbols, set the color slightly darker than your landmark buildings and change the color a little from time to time. It will give your city a subtle but more realistic look.
- Use a small number of building types and roof types – it will make the city look more cohesive.
- Every building will need access to the road. Better establishments should have two ways to get to the road (e.g. a front door for visitors and a back door for trash and other things). Access can be circuitous, through an alley, but a building can’t be used if no one can get to it. But don’t worry too much if you block access to an occasional building. You have several ways to explain it:
Next time we will fill in a few more details in this section and talk about rendering effects – they turn the most mundane map into something wonderful. Then for a break we will turn to mapping some sections outside the city wall, where the CD3 automatic tools really can shine.
2 Comments
SteveDavies | February 6, 2012 | city planning, how to, mapping cities
First off, I apologize for the long lag between part 5 and 6 of this series: it was not my intention, but a series of life events conspired to take me away from mapping. But I’m back. Thanks to everyone for the kind words of support along the way.
If you need to refresh your memory about the project, here are links to Mapping Cities part 1, part 2, part 3, part 4, and part 5.
In this session, we’re going to fill in the blocks of our district with buildings, lots and lots of buildings.
We’re starting with the Entertainment district, which I’ve completely filled with block designations:
It’s a little hard to see in the overview, but I’m going to work on the block in the middle of the district – just where the bend in one road meets another coming from the right. You can see that the road is defined by the absence of buildings, and I’ve left alleys at random places throughout the block.
I’m purposefully haphazard about how I put these blocks in – for a medieval city, I don’t need a lot of square corners and perfect streets. The blocks become guidelines so that I know where to leave room for streets, squares, and public spaces.
We’ll start by putting in landmark buildings. We’re going to put these in from the CD3 symbol library –Read post 5 for an explanation why. I’m going to start by putting 5-7 landmarks for a block, that usually works out that each street has a few landmarks that make it interesting. Here are a few pointers to keep in mind:
- I’m using variable color symbols, and plan to do the city in mostly red tile roofs. I’m starting with color 167 for the large buildings, and plan to get darker for the other buildings – it will make the landmarks stand out a little more making them easier to find. To me it also looks like more sunlight on bigger buildings as well.
- Enabling smart tracking on the symbols lets me align them with the roads, which is a great help. But after that, sometimes smart tracking can fight you in getting the building in the right place. Just go ahead and get the alignment of the symbol correct, then move it if you need it in a different position.
- Most buildings in a city will have their shorter side facing the street – that reduces taxes and maximizes the value of the limited road space. For these first buildings, it’s a rule worth keeping in mind but also violating freely. After all, these are landmarks, which are supposed to draw attention.
- I like to expand the symbol collections and place specific buildings. But when I run out of imagination for that, I start picking randomly (or quit for a while)
- Take notes as you go! I can’t tell you how many times I’ve had a great idea for one specific building, that I’ve forgotten when I came back to work on the map.
Here are my landmark buildings placed:

Now we’re going to fill in a bunch of smaller buildings, using the Insert Building Tool (). I’ve darkened the red to 164, and used the following options:
Now, we’ll start putting in the smaller buildings, and next time we’ll give some tips to make everything look great without worrying. Here’s a shot of the block in-progress to show where we are going:

Comments Off on Mapping Cities Part 6 – Filling Blocks in CC3
SteveDavies | August 1, 2011 | building size, city mapping
We’re going to take a minute today to figure out reasonable sizes for the buildings in your city. I’m sharing some of my ‘rules of thumb’ for getting buildings that will work well. While you can finish a map without doing this, if you take a minute to make reasonable sized houses, your blocks will look better and it will be easier to just automatically convert a building from the city map into a tactical encounter map.
Our first order of business is to estimate the size of a pub. Why? Because it is a good reference size for all other business buildings.
Start by figuring out how many patrons the tavern should be able to handle comfortably. Let’s say for a given merchant-class ward, a typical pub should be able to handle 30 patrons easily. I assume that a nice tavern needs about 5’x5’ for each patron. If you want to ensure there is plenty of room for tactical roleplaying (in other words, a bar fight with lots of running around), you might double this. High end taverns might have 2-4 times as much space, and a cramped seedy bar might have half as much space.
So for our nice unassuming tavern that can serve 30 people, we will use 30 5’x5’ squares, which makes it roughly 30’x25’ in size.
An alternate way to get a rough size of typical buildings in our ward is to reference the symbol set that we’re going to use. Below I have two symbols from the symbol set I’m using.

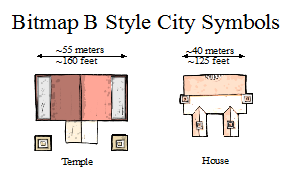
Standard CC3 City Symbols are landmark buildings
I like to use these symbols for landmarks and unique buildings, rather than for the myriad of buildings that fill in a block. Note that these buildings are significantly bigger than the tavern that we calculated above. That difference in size will look ok for the temple (it can and probably should be bigger than the surrounding buildings), but there should not be such a difference between the house symbol and the other buildings.
I will handle this in two ways. First, I’ll increase the size of my ‘standard’ tavern, doubling it in size. That will put it more on a scale with the house. Second, when I place these landmark buildings in the map, I will treat them as large buildings – essentially the house is a manor houses. So if I want to use them as more modest buildings, I will need to scale them down to 50% to 75% of the original.
We’ll spend some time next time using these buildings to fill in a map. But if you’re anxious to get going now, put a reference building at the side of your map that is the size that we just calculated, and maybe a couple of variants with similar area but different proportions: 60’x25’, 40’x40’, 50’x30’. And periodically refer to that as you add buildings. If you are using the automatic building tool, set up your building sizes based on this reference.
Comments Off on Mapping Cities Part 5: Sizing Buildings
SteveDavies | July 12, 2011 | city planning
In this, the fourth part of our series on mapping cities, we will spend time setting up a district using Campaign Cartographer 3 (CC3). We will be using the City Designer 3 (CD3) add-on because it makes the job of mapping cities much easier. But pretty much everything we do in this tutorial can be accomplished with the based program – it’s just more work, and your style and building options are fewer.
When we get to the step of mapping individual buildings, you’ll definitely want to have a copy of CD3 because the end result is so much better.
We are going to rough out the entertainment district of our map (the red district just above center):

My original city map was created in an old version of CC3, so we’re going to copy the district and put it in a new map.
We can save ourselves later work by checking the size of the district. It’s easy in CC3 by using the Distance tool (Info>Distance). Checking the our district it’s 1592 meters east-west and 1133 meters north-south. Just write that information down for later.
Now we want to copy this district, and any important landmarks, to a new map. Select menu Edit>Copy (or shortcut ctrl-c) and select the entire district that you want to copy. Most likely, you will get extra elements – at this point that is ok. Here’s how my select looked:

- Selecting districts from the city map
Press “D” for do it, and select an origin – in the middle of your district is easiest.
Now we start a new map, using our own settings:

- First step of creating a new city map
I’ll use a CD3 Bitmap A style:

Using the CD3 Bitmap A template
When you get to the screen to set dimensions, go back to the dimensions you wrote down from your original map. I like to round them up and add about 20% on – to give myself some room to work and also show a bit of the surrounding area. So I’m going to change my dimensions from 1592×1133 to 1920×1440:

Enter the dimensions you recorded from the original city map
I’m going to set the background to cobble, since this is a dense city center and there will be little greenspace. I don’t usually enable multiple levels – I find it’s easier to add the new levels as I need them.
When you are done, you should have a map something like this:

- Our new map, a new canvas to cover
Now, to insert your old district, just select Edit>Insert (or control V). You can see that I grabbed a few things that I don’t need (I have effects turned off so everything is solid):

I’ll quickly delete the extra wards and get us down to the district we want:

- After deleting we’re ready to go
You can still see the major road and the boundaries of the district.
I leave these in place as they are until I’m done with the next step, which is laying out the blocks of the ward. Ultimately, we will cover the blocks with buildings, but for now they let us see sections of the district and where squares, roads, and alleys should go.
I typically do the blocks as just white polygons on a new “REFERENCE BLOCK” sheet. That way I can hide them when I want. Just go ahead and start drawing them, making sure that you don’t cover the roads, and you give enough room for alleys and access ways. Here I’ve filled in the first blocks:

- We put reference blocks starting from one corner of the district
Stay tuned for next edition, where I’ll show you all of the blocks filled in, and start talking about building sizes.
3 Comments
SteveDavies | June 21, 2011 | city planning
In the previous two installments of this series, we determined where a city is likely to arise, and did some basic planning for a city (read Mapping Cities Part One here and Part Two here). In this installment we will plan out a district in more detail.
There are four things to keep in mind when thinking about the structure of the district:
- Roads and Traffic: Are people mostly passing through (e.g., a gate ward) or heading to this district (e.g., a merchant area)? This will determine road size and pattern, with wider roads for main thoroughfares and places where livestock must travel.
- Planned or not? Cities rarely arise all at once, and different areas get different amounts of planning. Unplanned sections typically grow up along a road, or near a point of interest such as a well, then fill in between the spaces. Planned areas are more likely to have uniform plot sizes and more organized roads.
- Style of the buildings: Do the buildings face inward, typically toward and inner courtyard? Or do they face outward toward the street, typically with stores or other commercial endeavors facing the street. Buildings with courtyards will require more space.
- Density: Near the center of a city there is little open space – houses are more tightly packed. Further away from the center there is often room for livestock or family gardens.
Affecting all four of these mapping factors is the question of age: As districts age, they change and deviate from plans, space is filled in, walls are torn down, roads and squares infill. A fundamental right for city dwellers was the right to own land, and new cities are laid out in standard-sized burgage plots. The size of these plots vary from city to city, but are uniform within the city: Typically 10-20 meters wide facing the street, and 50-100 meters deep when first laid out.
The plots are large enough for outbuildings, keeping animals and small gardens. But as space pressure increases, the plots are subdivided and filled in. Usually the divisions stay within single plots, but the example below shows two plots that were split up together.

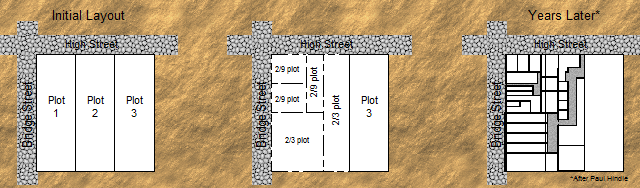
Over time city plots are filled and subdivided
As you lay out plots, you need to make sure that every building has access of some sort to the road, even if it is through an alley. In the example I give above, the grey areas are alleys. As you have ideas for points of interest, add them now or make notes for later.
I occasionally cheat and put in plot divisions that are not road-accessible. I just know that they will need a passageway through another building (maybe an arched gateway) or they need to be abandoned buildings that I can use later in my campaign.
Next time, I will show you how to apply these rules in Campaign Cartographer, using an entertainment district of my city.
3 Comments